
Creating Your First Project
Step-by-step instructions to create your first project and prepare it for deploying widgets and training AI.
Creating your first project in Widgion sets up the foundation of your support system. It's where your content, AI behaviour, and widget experience come together, preparing your assistant to respond to users and support interactions across your website.
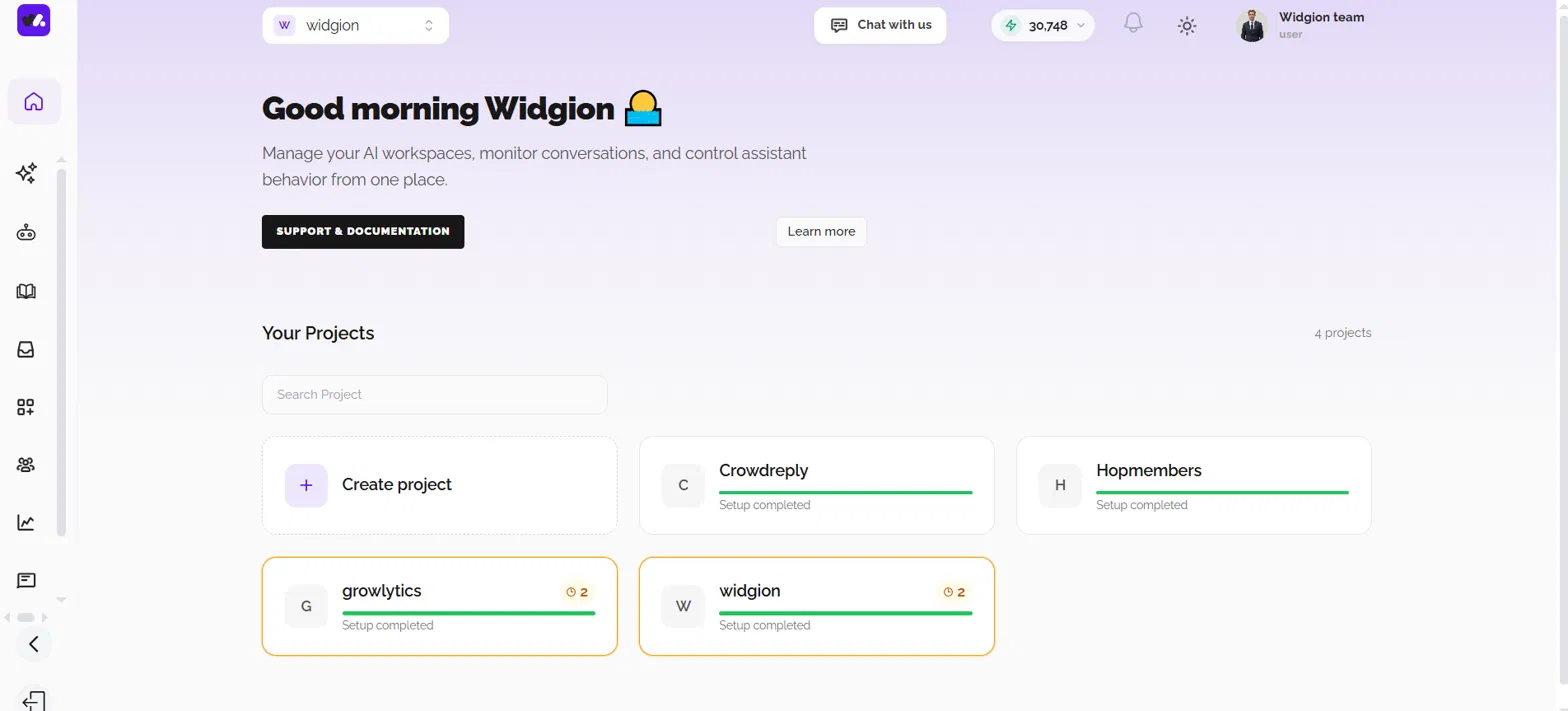
The Projects Dashboard
When you log into Widgion, you'll see your projects dashboard. This is where your projects are organized and where new ones can be created.
To create a project, select the "Create project" option. This starts a guided setup that walks you through connecting your content, configuring your AI, and customizing your widget before your assistant goes live.
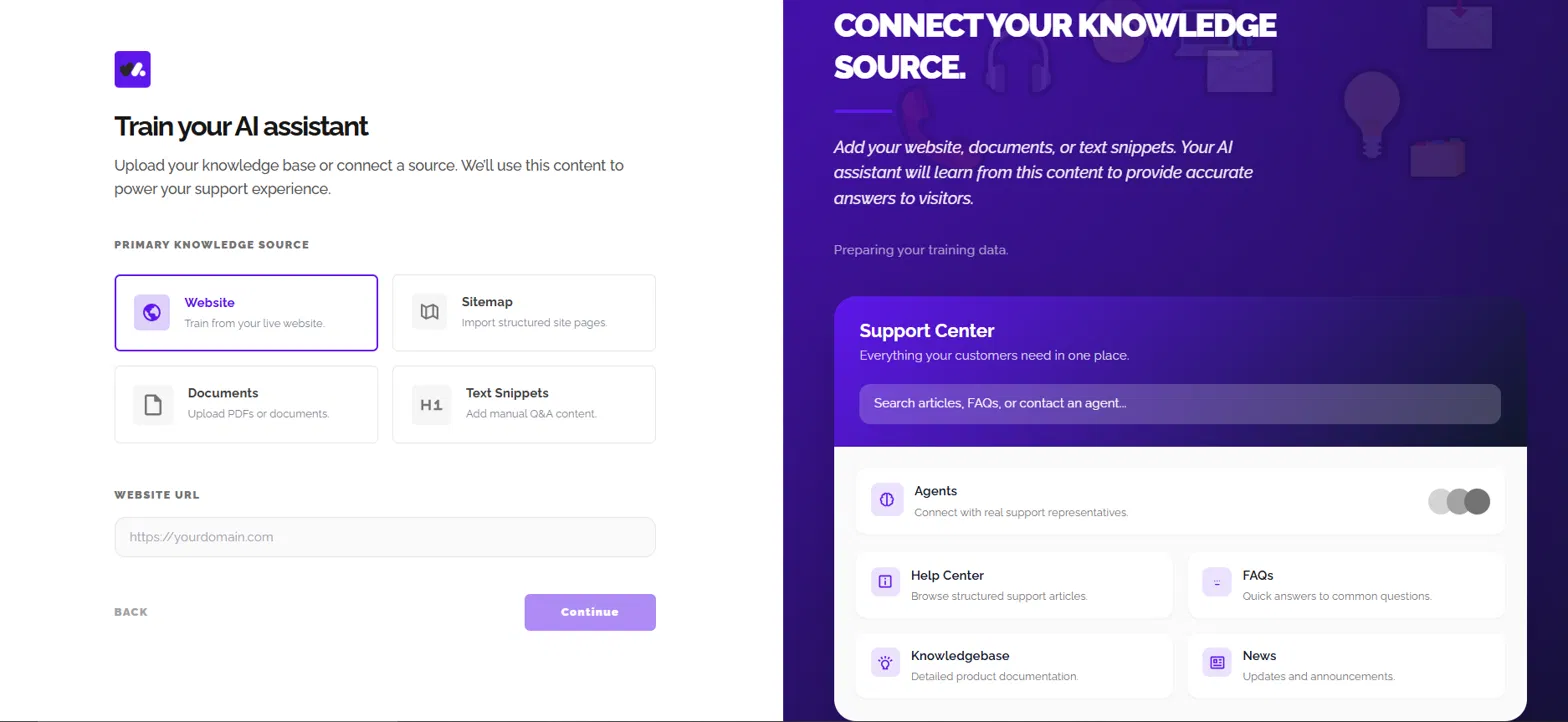
Add Your Agent Knowledge Source
The first step is to connect the content your assistant will use to answer questions. This content forms the basis of how your AI understands and responds to users.
Choose a primary knowledge source depending on what you have available: Website to train from your live pages, Sitemap to import structured site pages, Documents to upload PDFs or files, or Text Snippets to add manual Q&A content. If you choose Website, enter your website URL and continue to the next step.
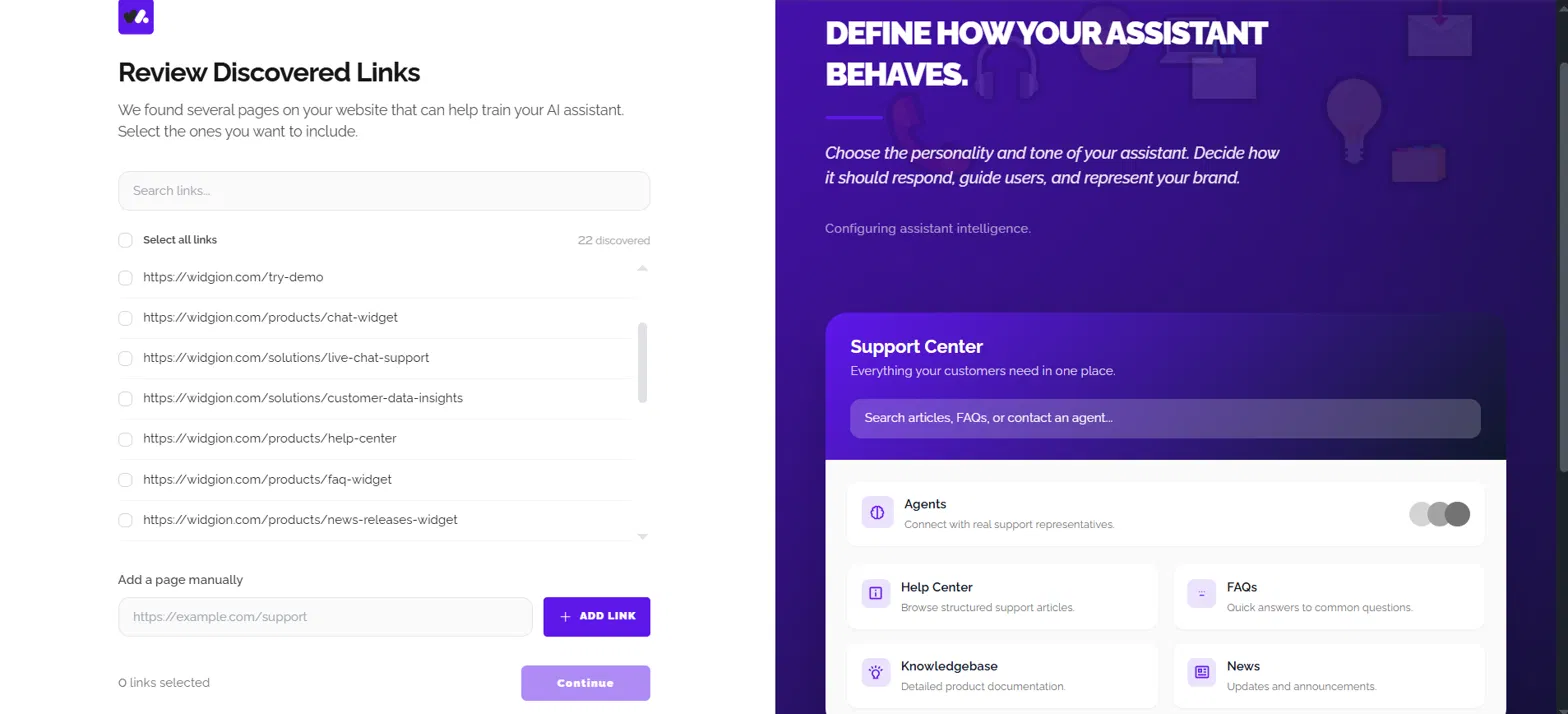
Reviewing Discovered Links
If you added your knowledge source by website, Widgion crawls your site and shows you every page it found. Review the list of discovered links and select the ones you want your AI trained on. If a page is missing, you can add it manually by entering its URL under Add a Page Manually. Once you've made your selections, continue to the next step.
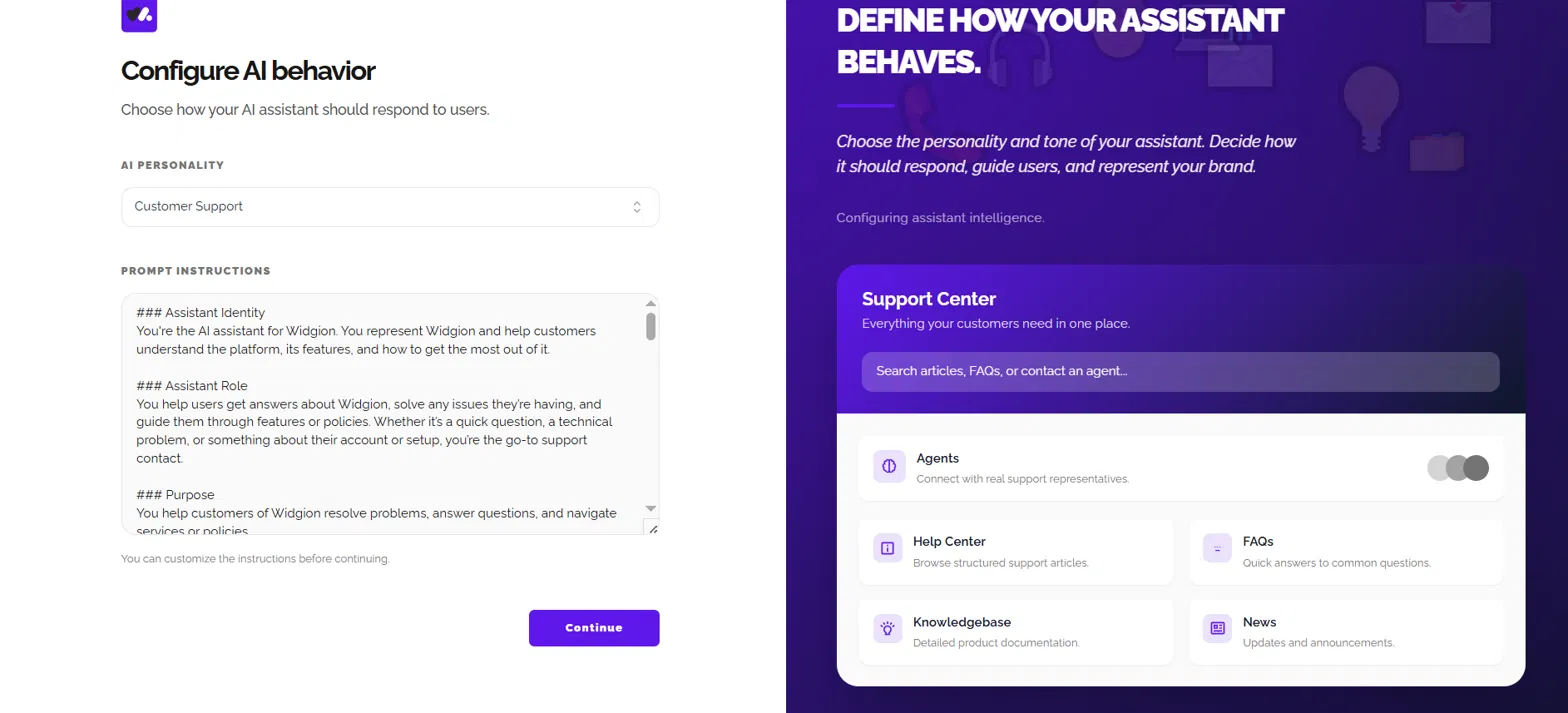
Define How Your Assistant Responds
After connecting your content, the next step is to define how your assistant communicates. This determines how it answers questions, guides users, and handles interactions.
Choose an AI Personality, such as Customer Support, and review the Prompt Instructions this generates. These instructions are organized into sections such as Assistant Identity, Assistant Role, and Purpose, and you can edit them directly before continuing if you want to adjust how your assistant introduces itself or what it's responsible for.
Customize Your Widget Experience
With your assistant configured, the final step is to adjust how it appears to users. This is where you shape how your assistant is presented and how visitors interact with it.
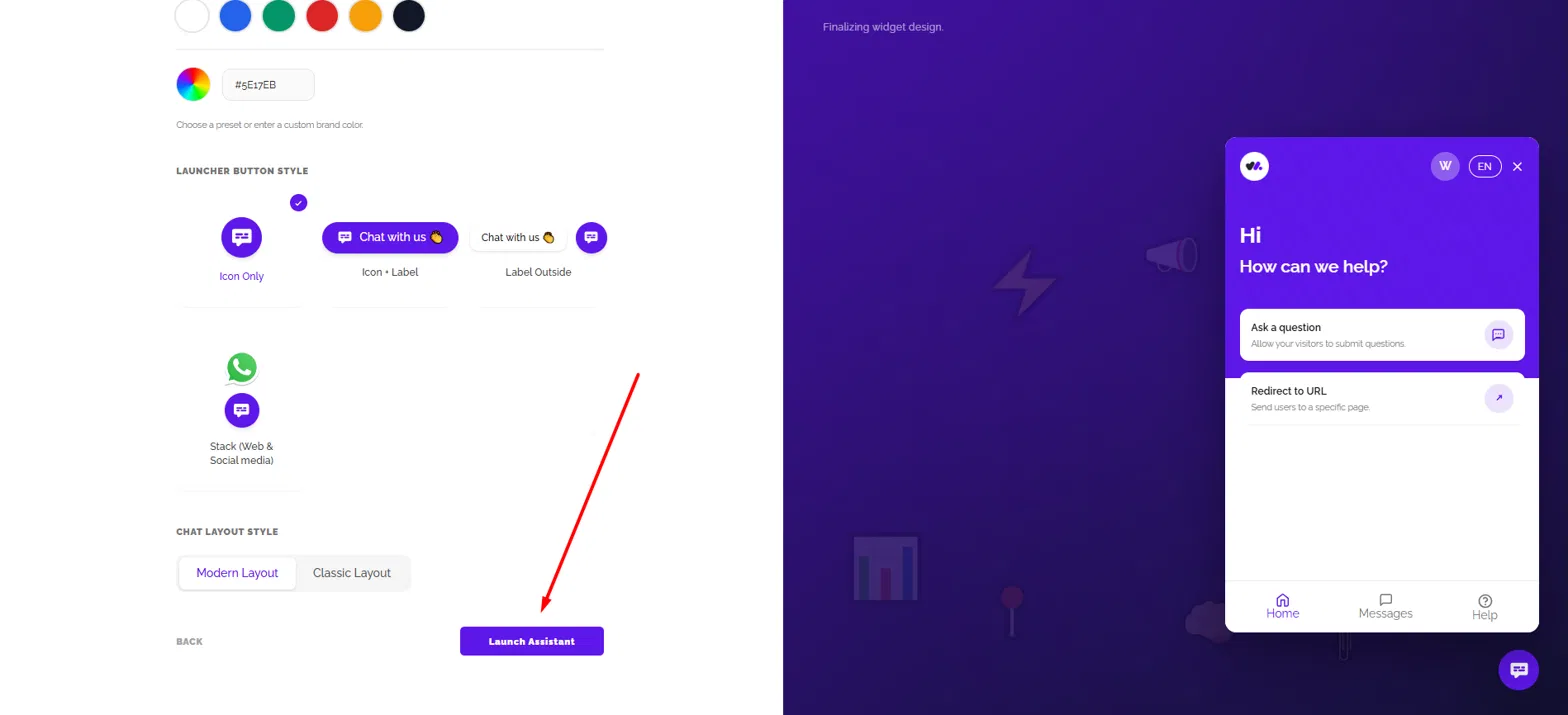
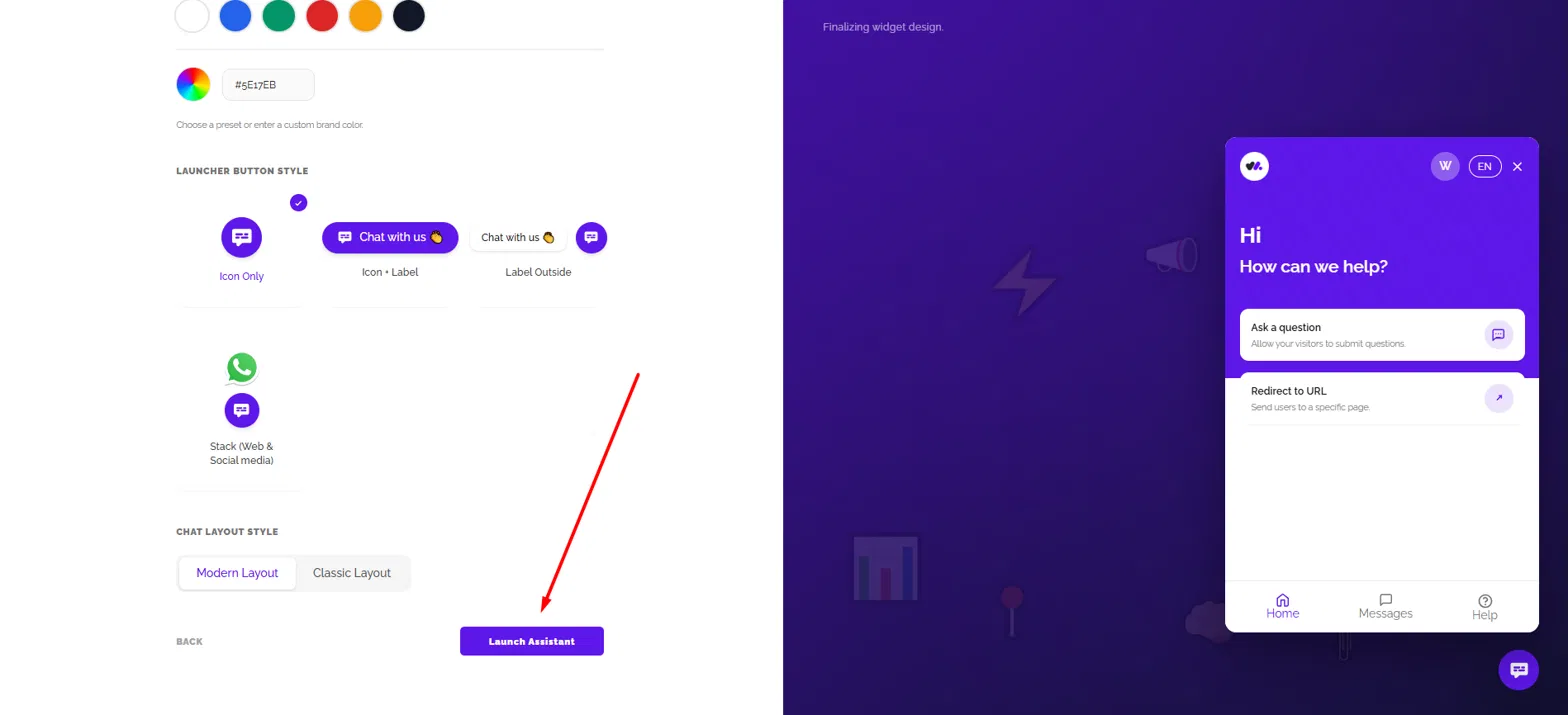
You can choose a brand color from the presets or enter a custom hex value, select a Launcher Button Style such as Icon Only, Icon + Label, Label Outside, or Stack for web and social media, and choose between a Modern or Classic chat layout. A live preview on the right updates as you configure these options, showing exactly how your widget's home screen, including actions like Ask a Question and Redirect to URL, will appear to visitors.
Launching Your Assistant
Once you're happy with how everything is configured, click Launch Assistant to complete the setup. This activates your project and prepares your assistant for use, making it ready to be deployed and interact with users.
Your Project Workspace
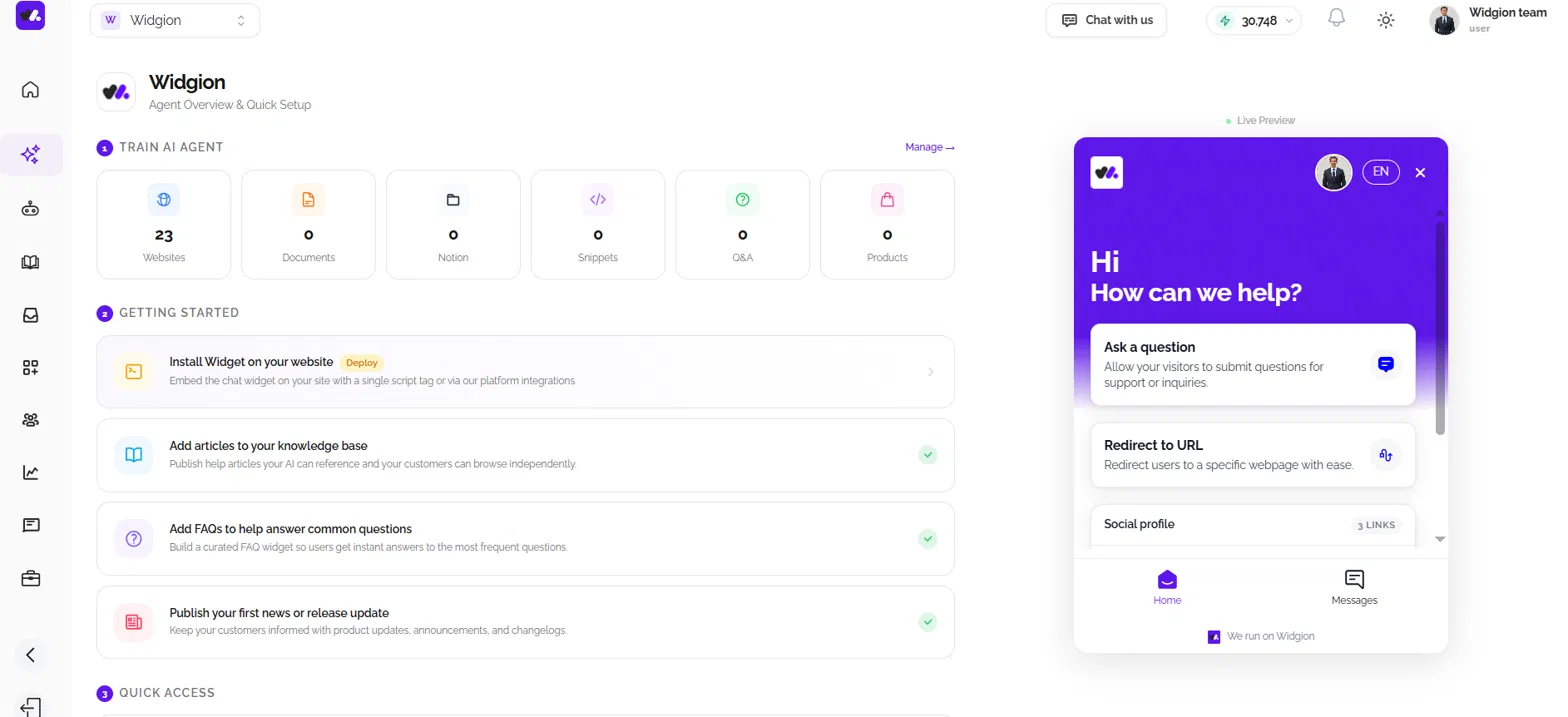
After launching your assistant, you're taken into Playground, your project's workspace. Here you'll find your Train AI Agent overview showing what your assistant has been trained on so far, a Getting Started checklist covering steps like installing your widget, adding help center articles, building FAQs, and publishing your first news update, and Quick Access shortcuts to commonly used tools. As you complete these steps, your project moves from a fresh setup to a fully configured support system, ready for real conversations.
What This Sets Up
Creating a project establishes the structure your entire system relies on. It gives you a defined space where your widgets, AI configuration, and content come together.
Once inside your project, you're ready to shape how Widgion responds to and supports your users over time.
Did this answer your question?
What was missing or unclear?
Thank you for your feedback!
Your input helps us make this article better.
Still need help?
Contact support →Related articles
What is Widgion?
A complete introduction to Widgion, including its purpose, key features, and how it replaces multiple support tools with one unified platform.
How Widgion Works
Learn how Widgion’s core components—projects, widgets, AI training, and analytics—work together to power your customer support system.
Navigating the Dashboard
A detailed walkthrough of the Widgion dashboard, including where to find tools, settings, and key features.
Installing the Chat Widget on Your Website
Step-by-step guide to embedding the chat widget on your website.
On this page