
Configuring AI Agent Forms
Learn how to configure forms in Widgion to collect customer information, capture leads, and gather details during customer interactions. Copy
Forms help you collect information from visitors through your Widgion AI agent. You can create custom forms, configure the questions visitors answer, control when forms appear, review submissions, and customize messages shown before and after submission.
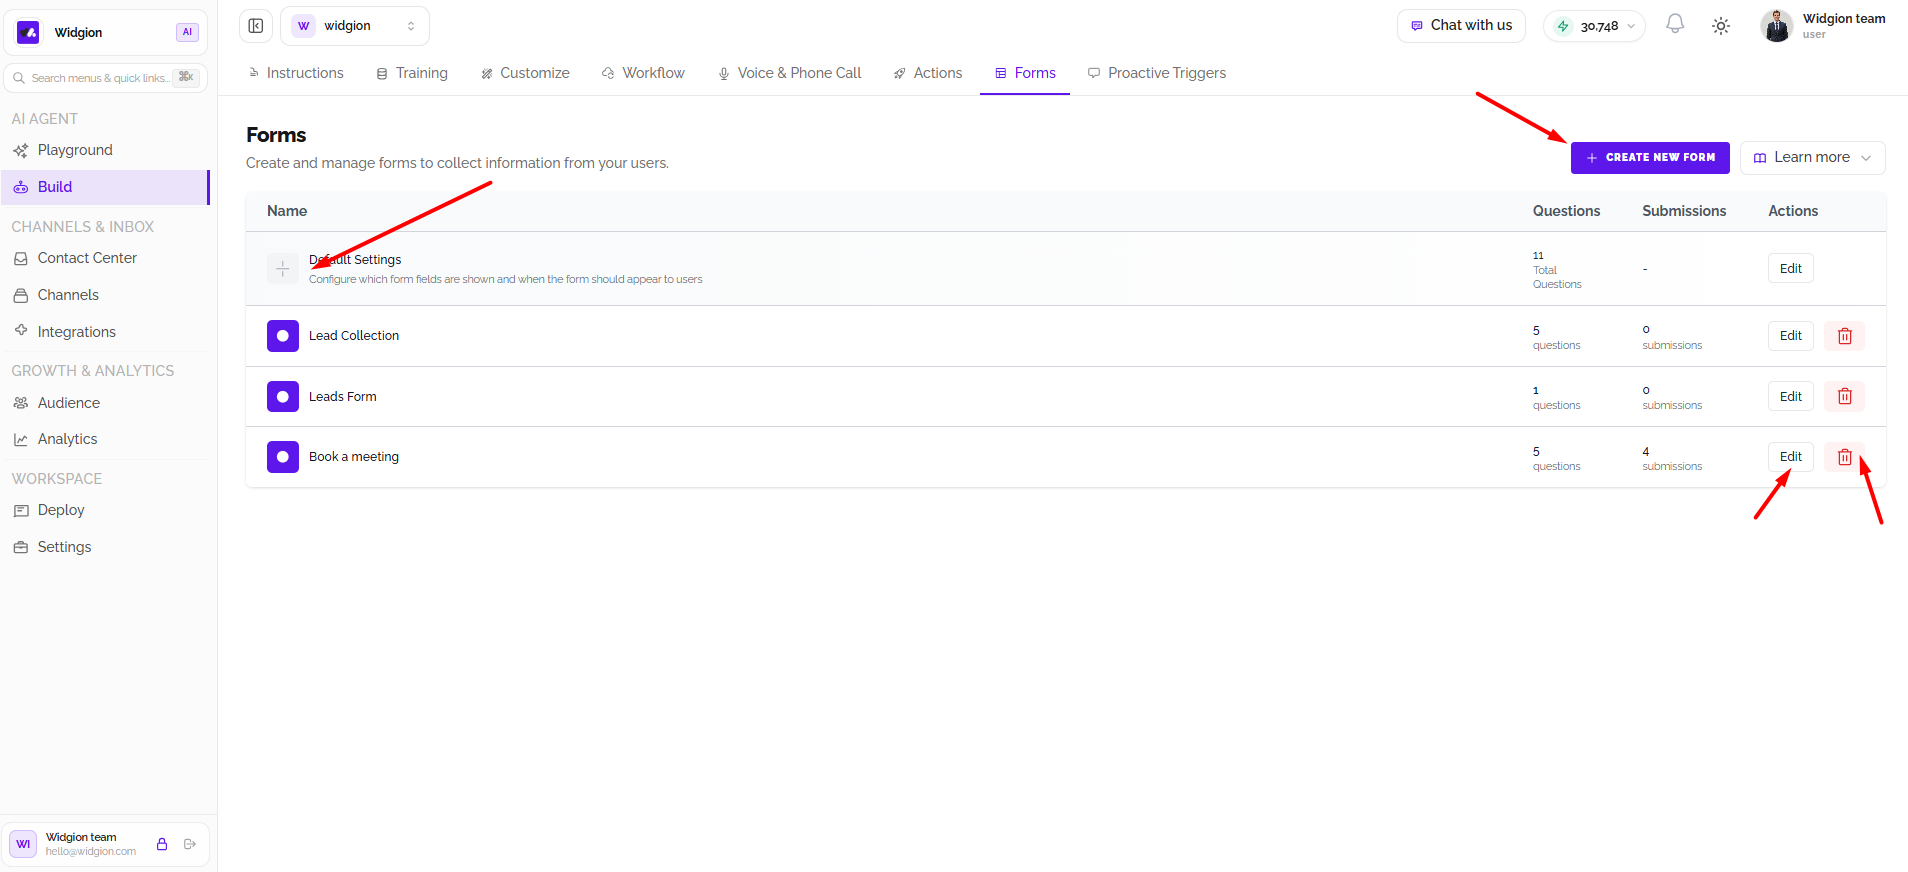
Exploring the Forms Page
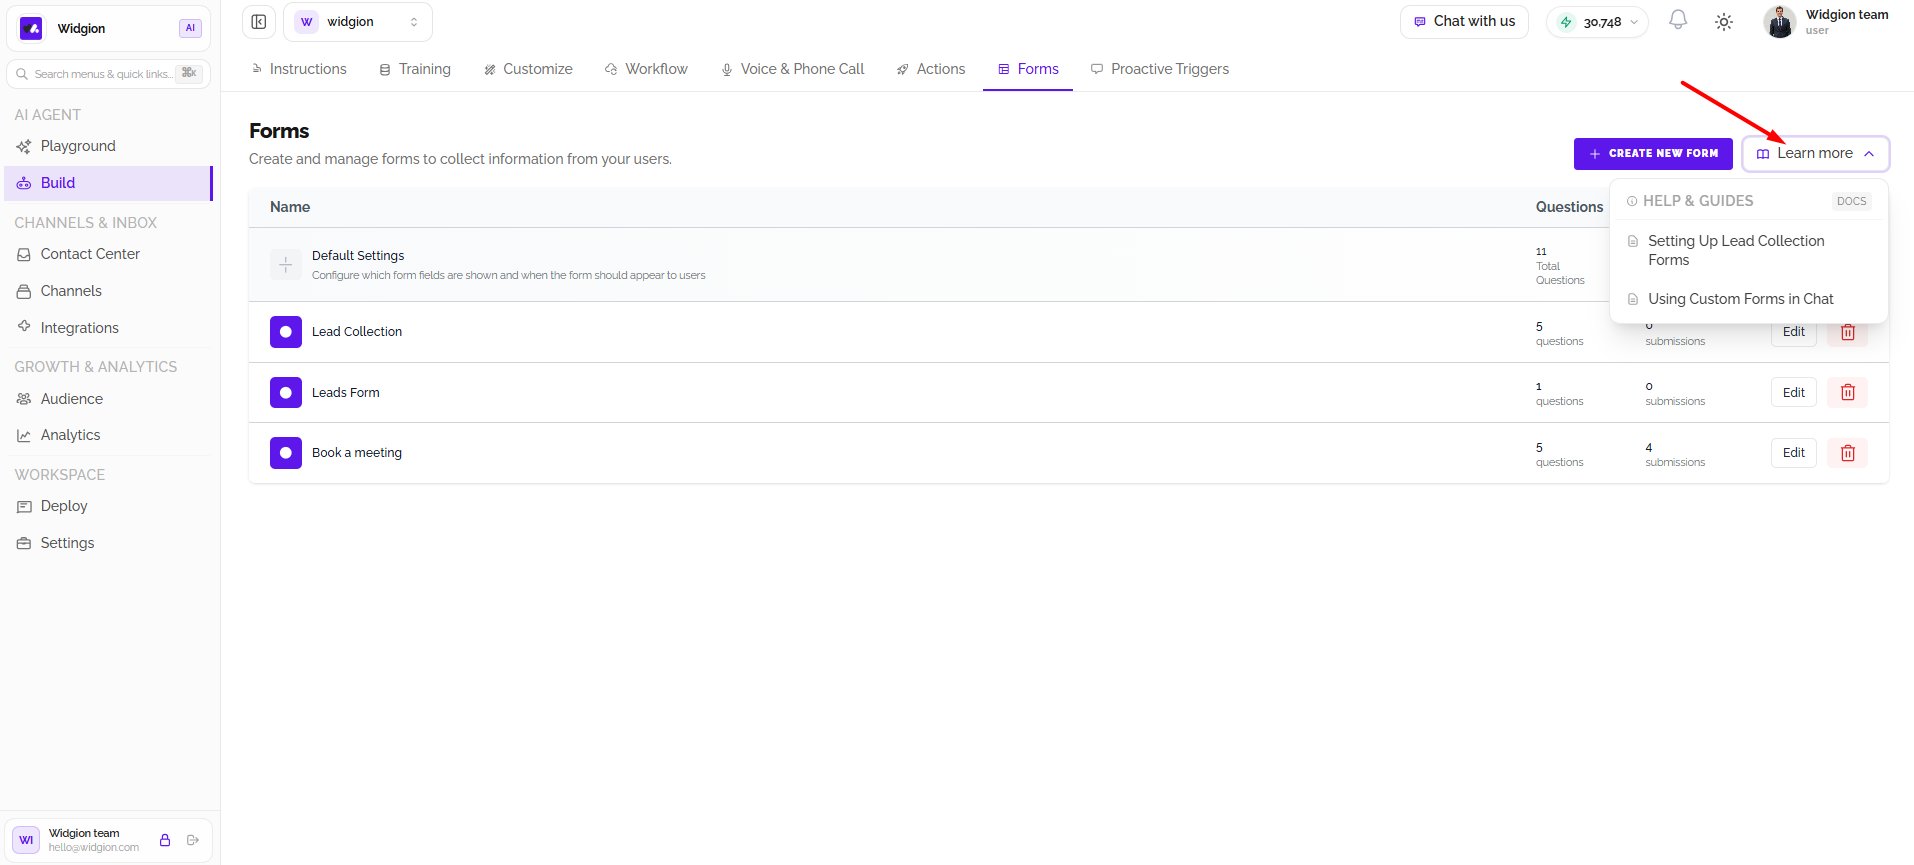
The Forms page displays all available forms in a table. Each row shows the form name, number of questions, submission count, and available actions. Select Edit to open a form, or use the delete icon to remove a form. Default Settings lets you configure shared lead-capture fields and decide when the contact form appears. The Create New Form button starts the process of building a custom form.
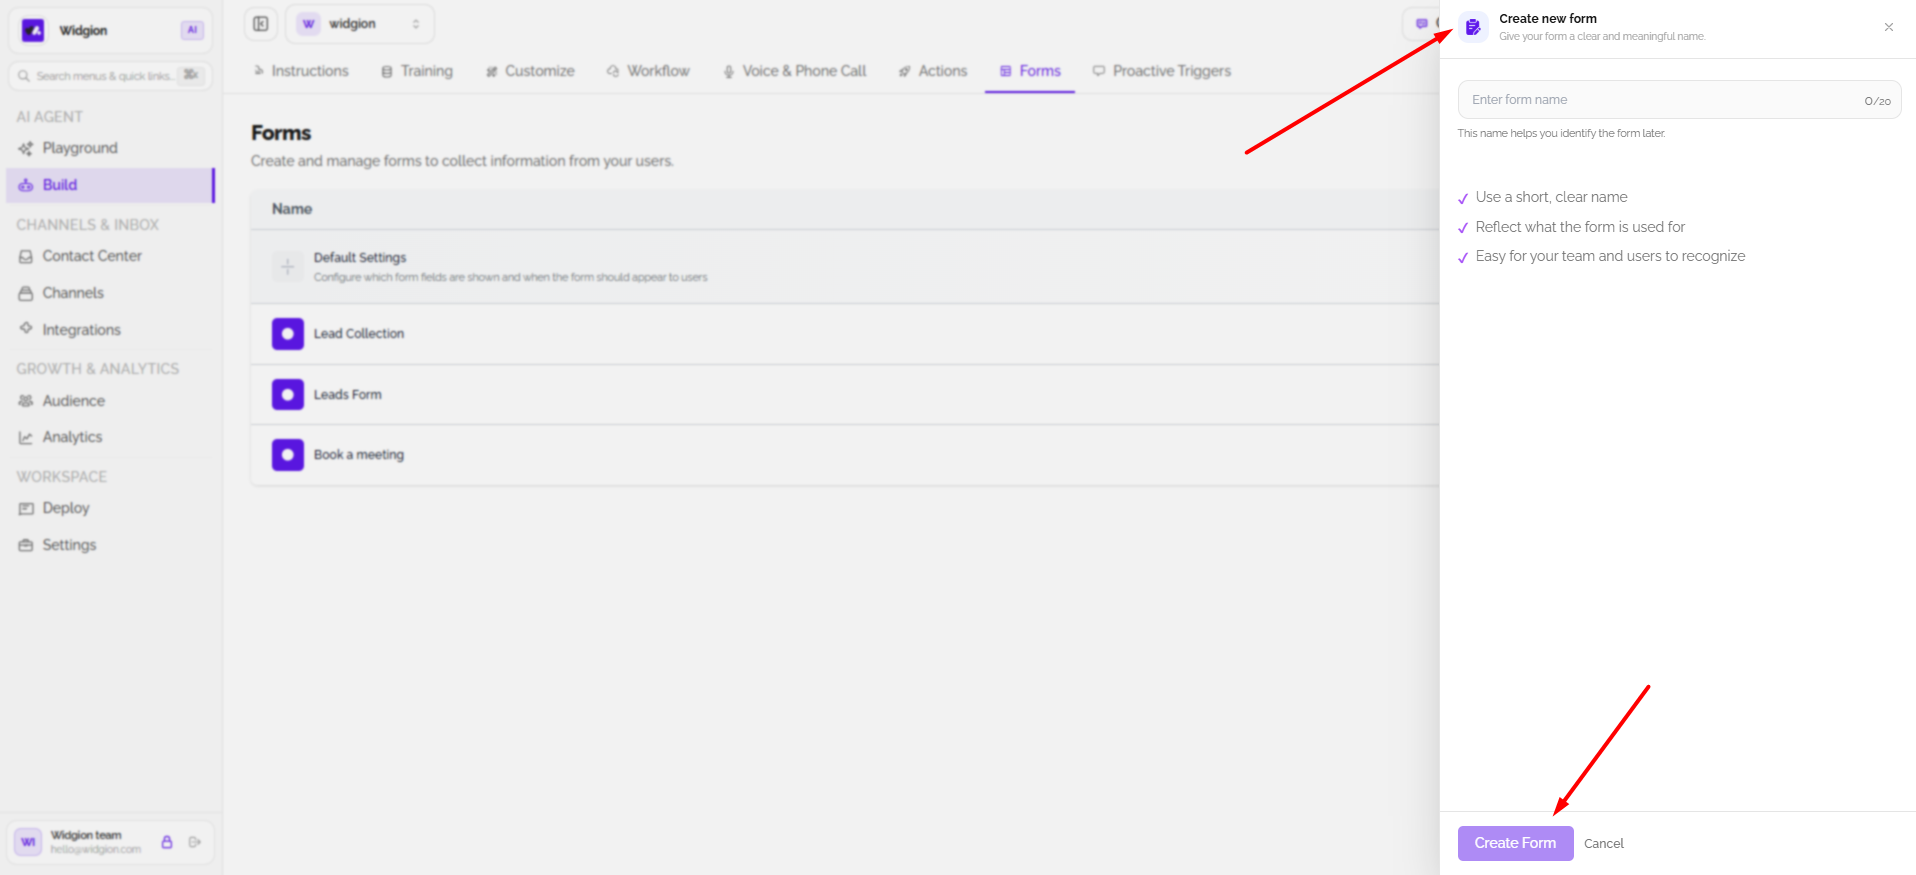
Creating a New Form
Select Create New Form to open the form creation panel. Enter a name in the Enter form name field. Choose a short, clear name that describes the form’s purpose and helps your team identify it later. Select Create Form to continue or Cancel to exit without creating it.
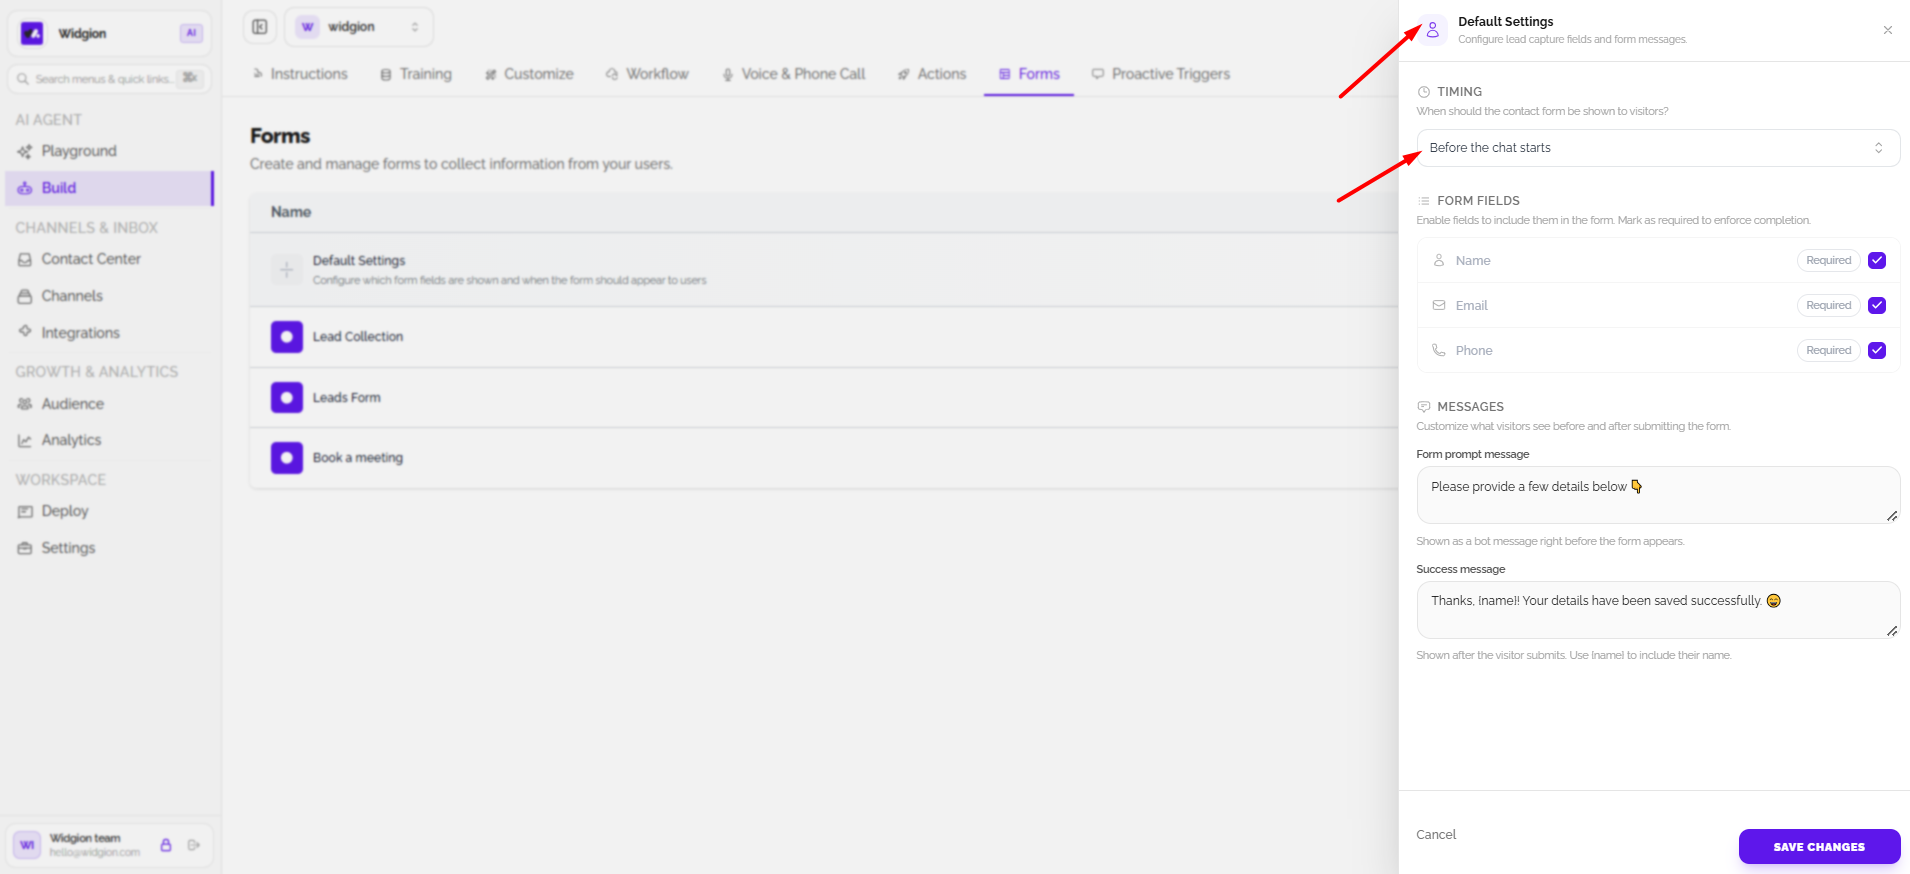
Configuring Default Form Settings
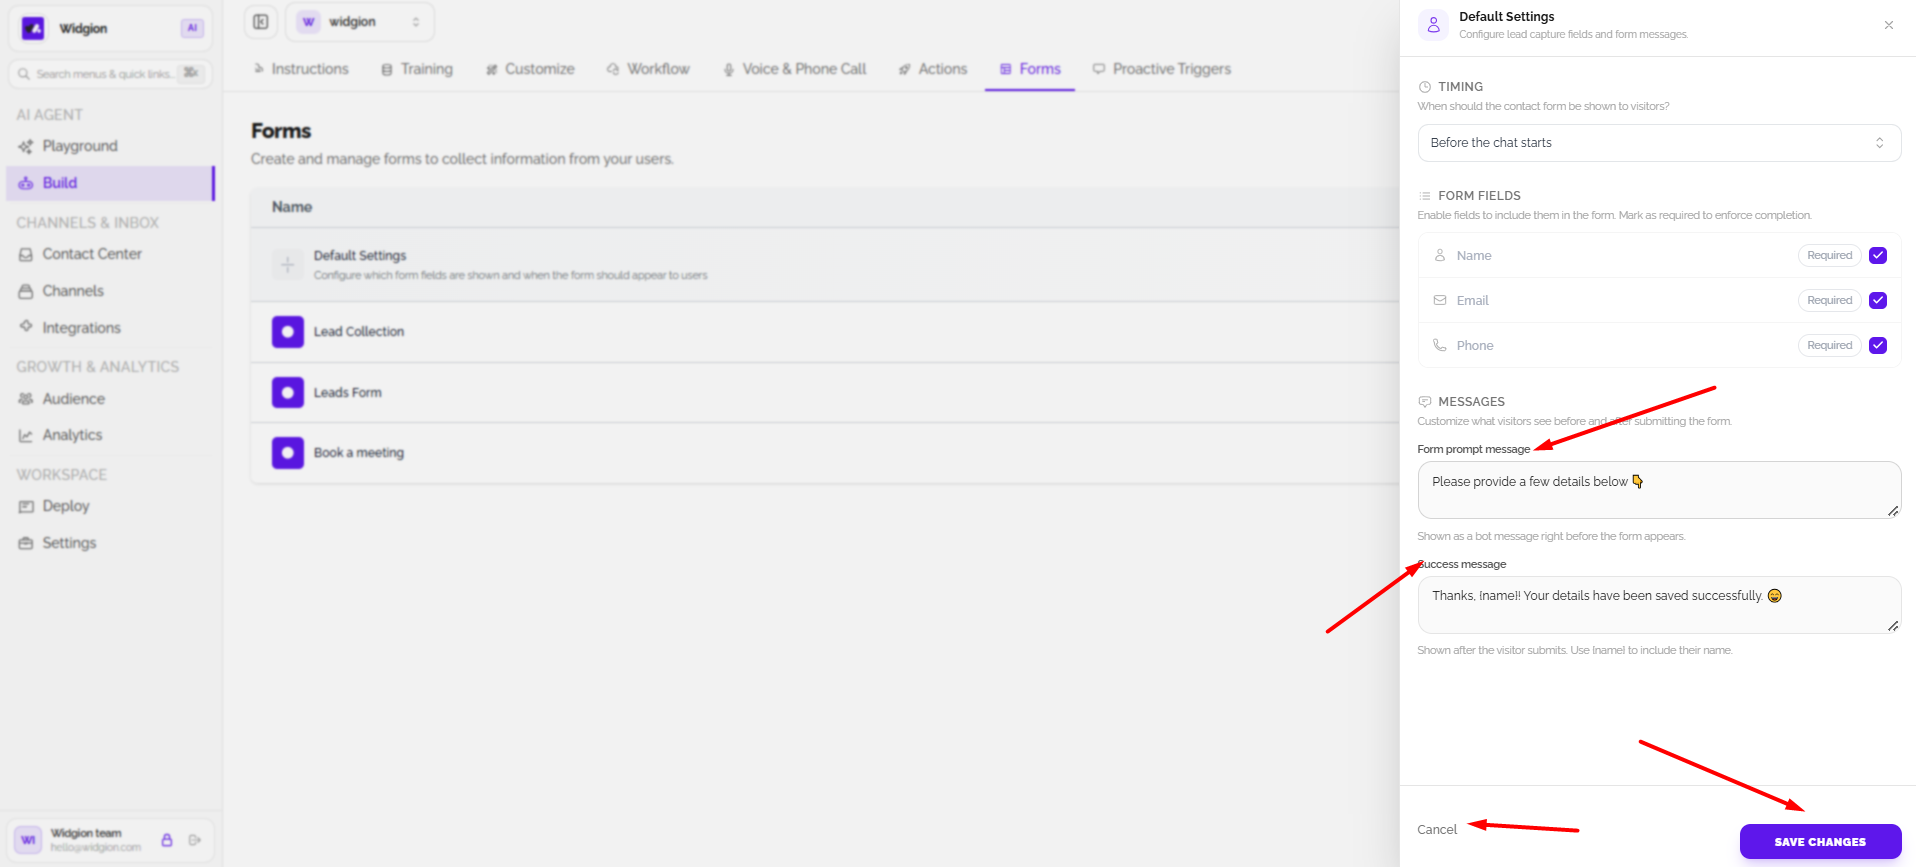
Open Default Settings to configure the contact form’s timing, fields, and messages. Under Timing, choose when the form should appear to visitors. The available setting shown is Before the chat starts, which displays the form before the conversation begins.
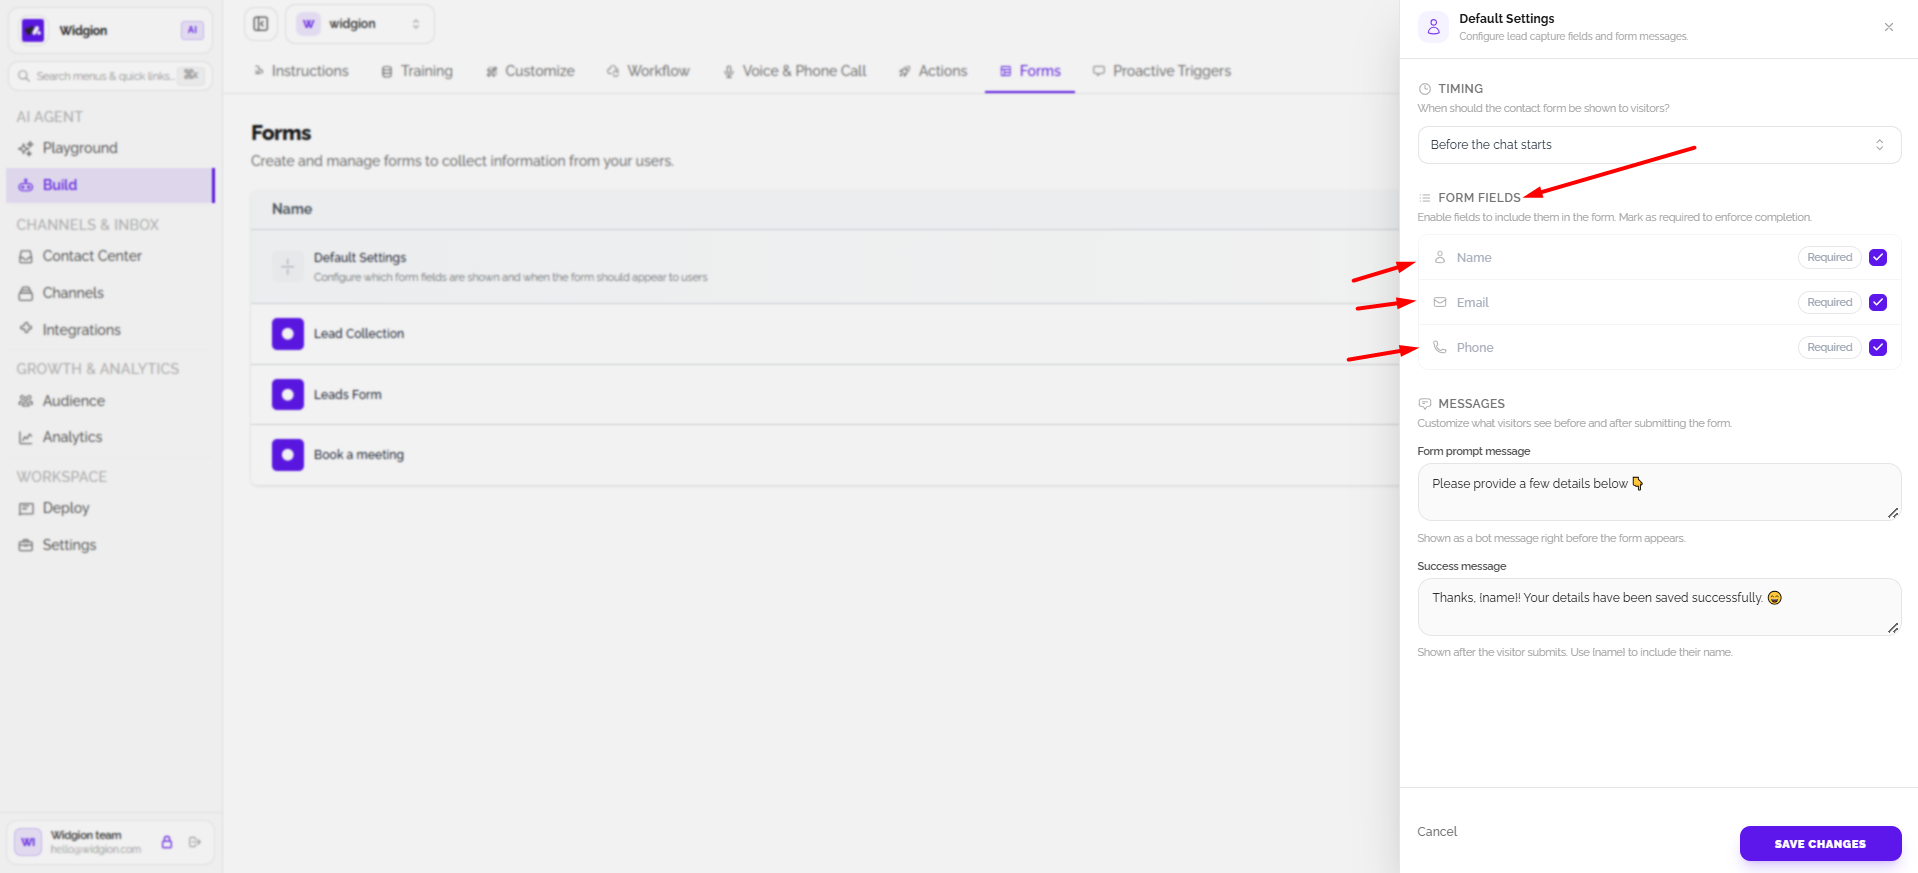
Form Fields
The Form Fields area controls which contact details visitors are asked to provide. Enable or disable Name, Email, and Phone using their checkboxes. Fields marked Required must be completed before the visitor can submit the form. Configure these fields according to the information you need to collect.
Form Messages
Under Messages, customize the text visitors see before and after submitting the contact form. The Form prompt message appears as a bot message before the form is displayed. The Success message appears after submission; you can use {{name}} to include the visitor’s name in the message. Select Save Changes to apply your default settings.
Building a Custom Form
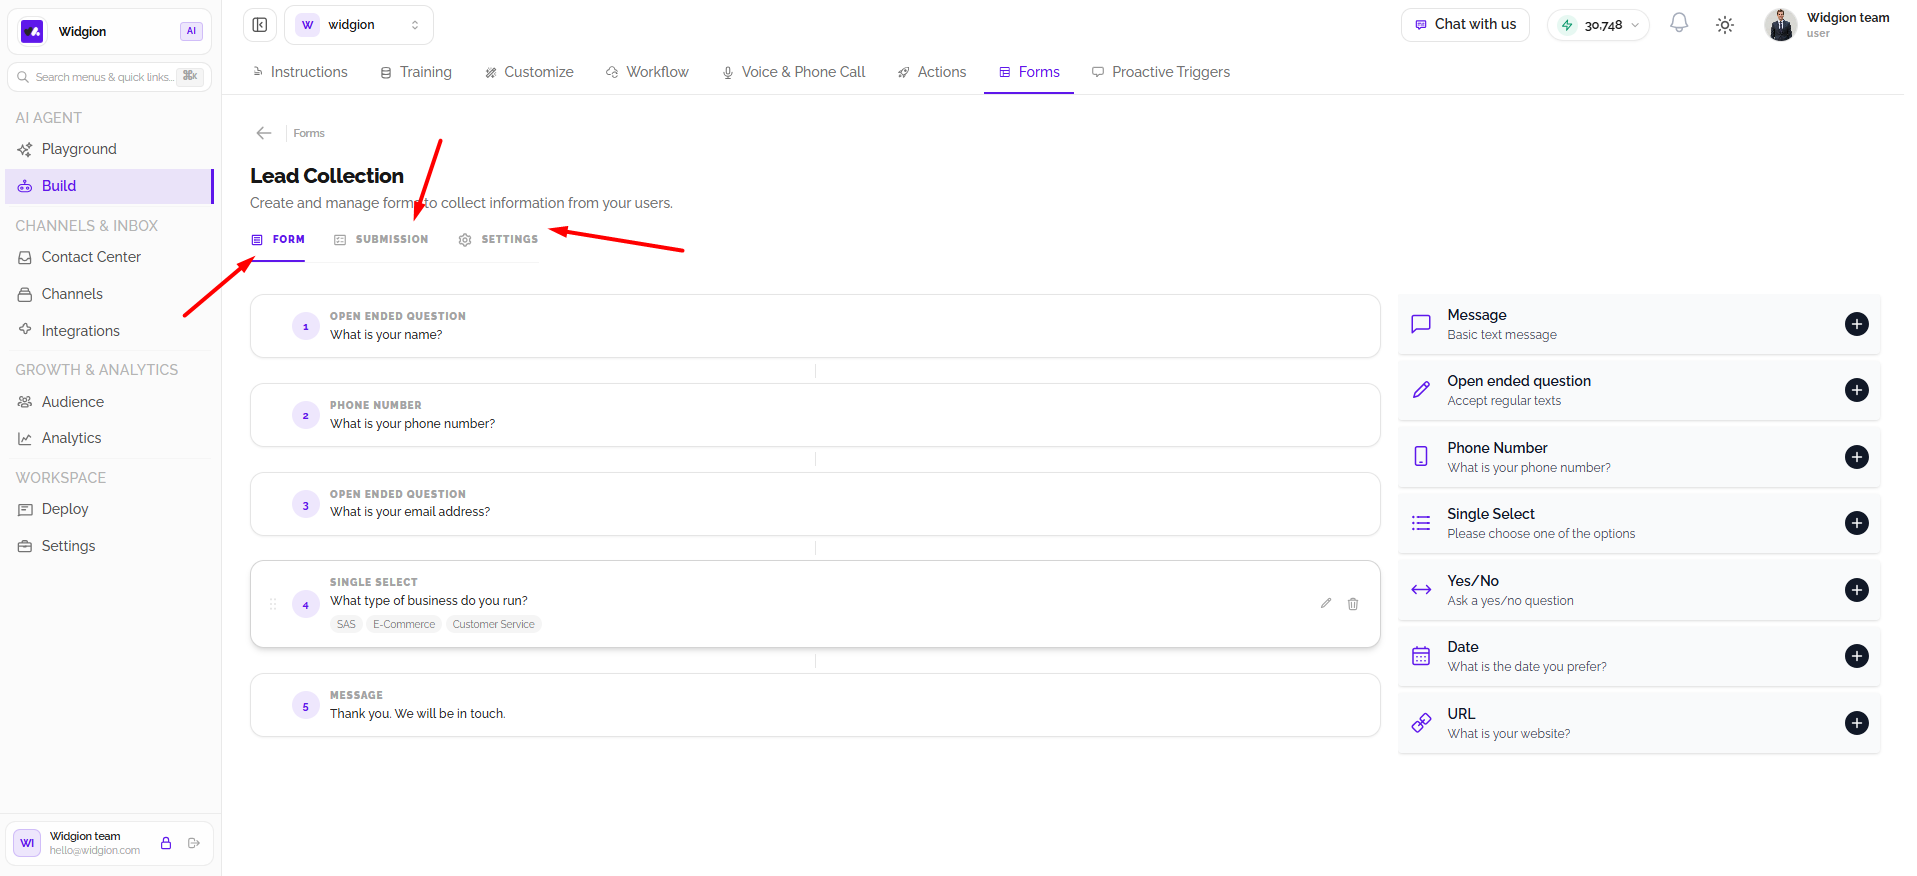
When you open a form such as Lead Collection, the editor provides three tabs: Form, Submission, and Settings. The Form tab is where you build the visitor’s experience. Questions and messages appear in sequence, allowing you to organize the information you collect and the messages shown during the form.
Adding Questions and Messages
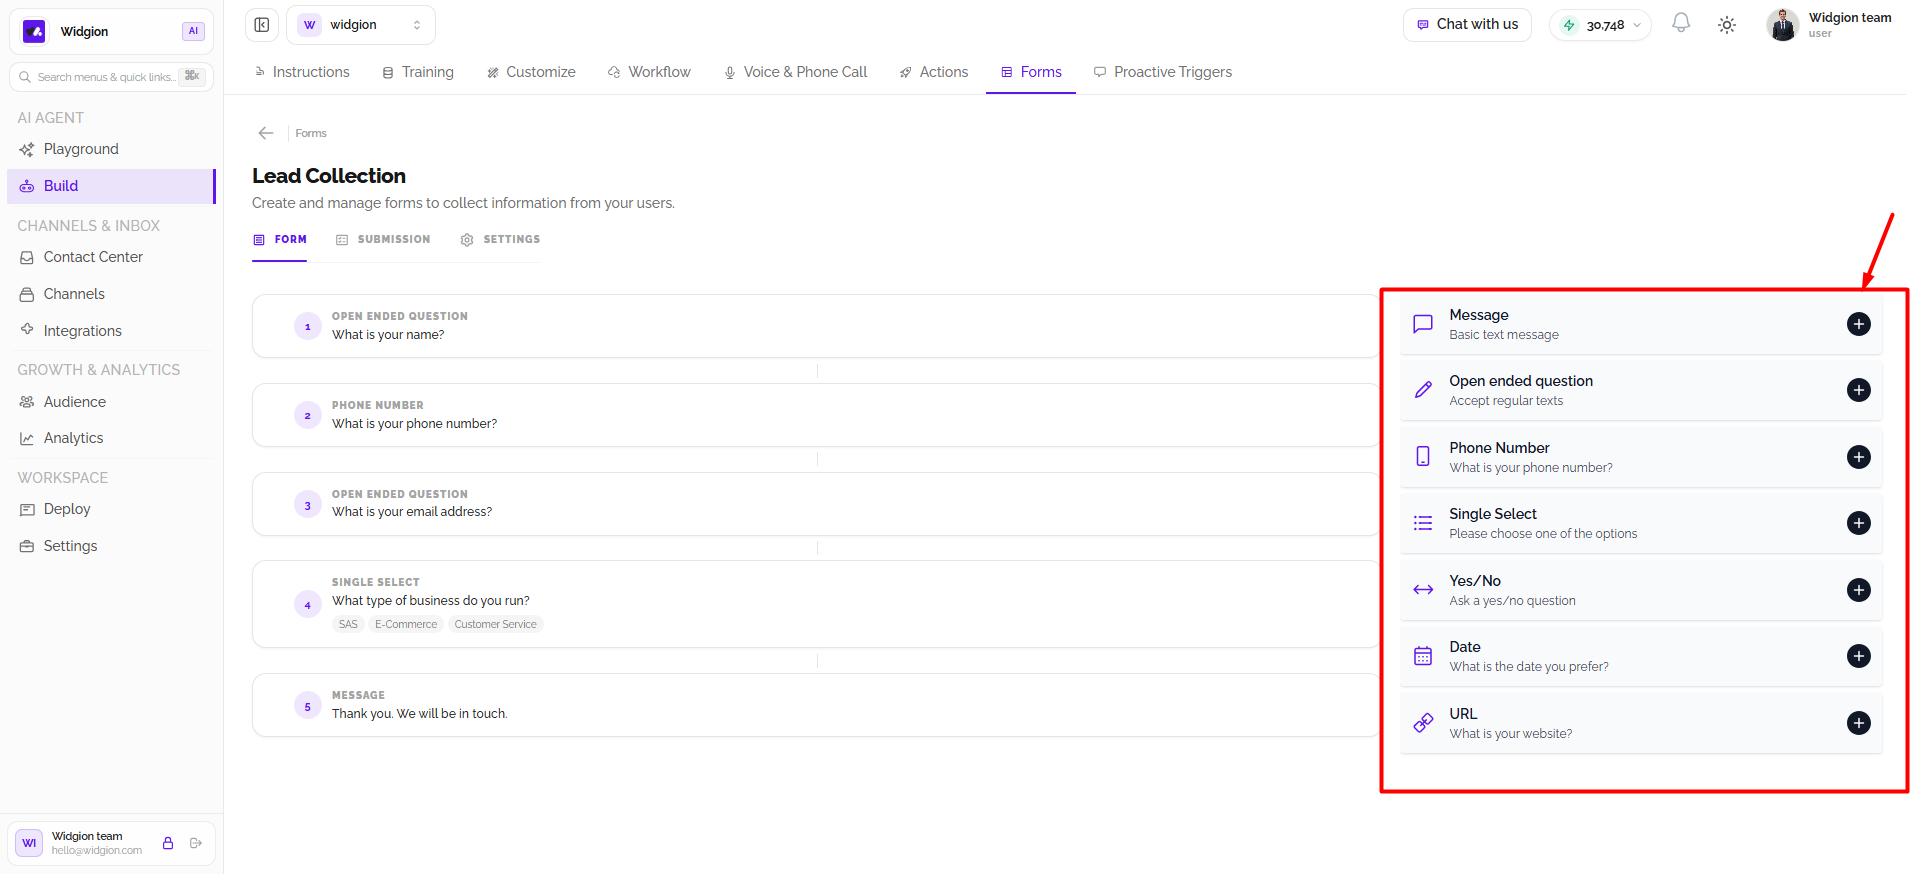
Use the options on the right side of the editor to add form elements. Message displays a text message to the visitor. Open ended question accepts a free-text response, while Phone Number collects a phone number. Single Select lets visitors choose one option from a list, and Yes or No presents a yes-or-no question. Date collects a date, and URL asks visitors for a website or link.
Select the plus icon beside an element to add it to the form. Existing elements appear in the form sequence, where you can review or edit their content. Arrange the questions and messages in the order visitors should encounter them.
Reviewing Form Submissions
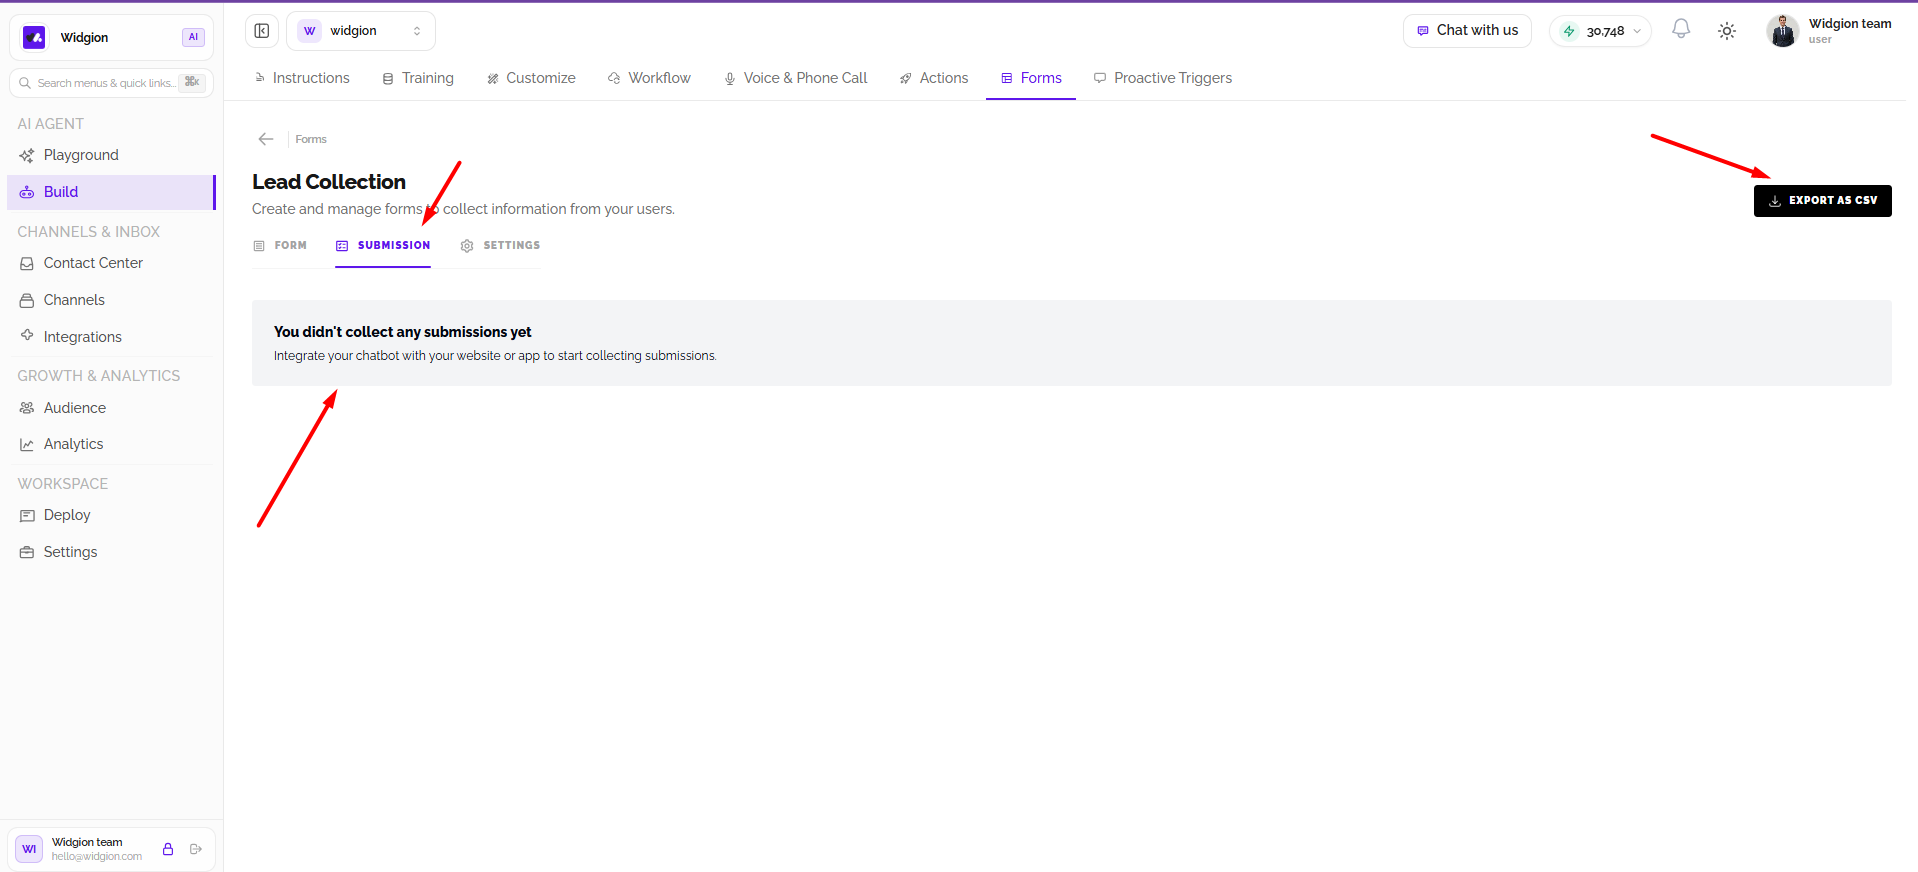
Open the Submission tab to review information collected through the form. If no responses have been received, the page displays a message indicating that submissions have not yet been collected and that the chatbot must be integrated with your website or app to start receiving them. When submissions are available, use Export as CSV to download the submission data.
Managing Form Settings
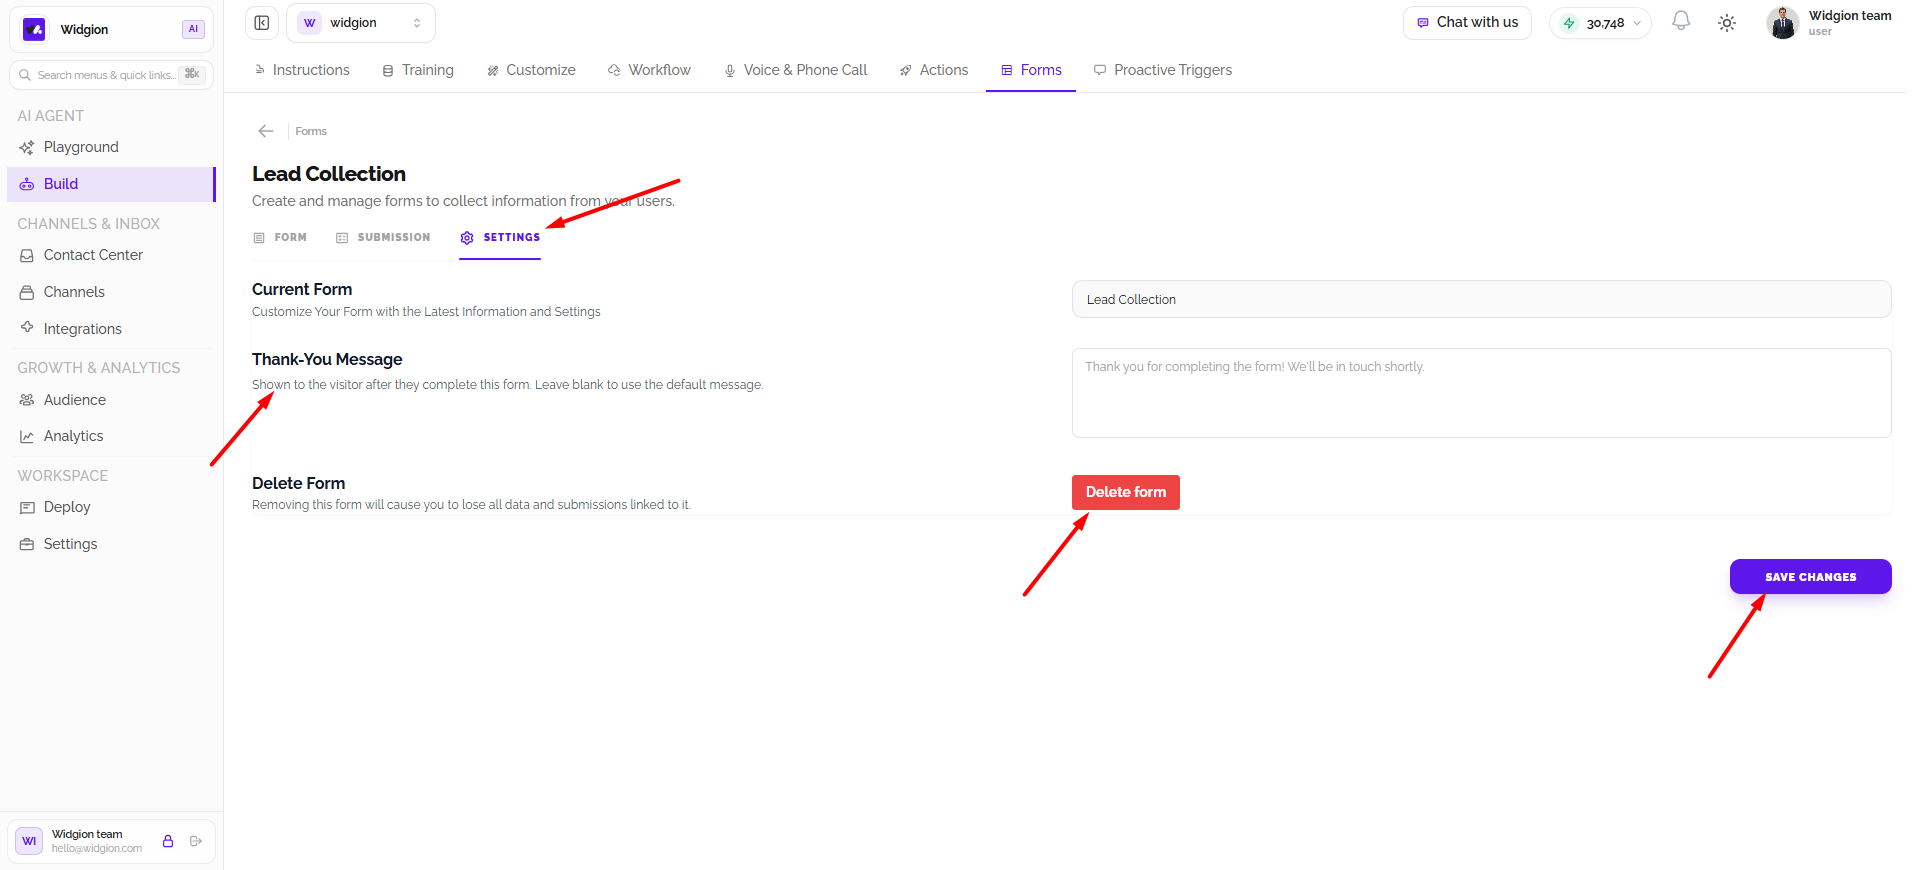
The Settings tab lets you update the current form’s name and Thank-You Message. The thank-you message is shown after a visitor completes the form; leave it blank to use the default message. The Delete form option removes the form and its associated data and submissions. Select Save Changes after making updates.
Using the Learn More Guide
Open Learn More to access the Forms documentation. The available guides shown are Setting Up Lead Collection Forms and Using Custom Forms in Chat. These resources provide additional guidance for configuring lead collection and using forms in conversations.
Summary
Widgion Forms lets you collect visitor details and other information through default contact forms or custom question flows. You can configure when forms appear, manage required fields and messages, build questions, review and export submissions, and customize each form’s settings.
Did this answer your question?
What was missing or unclear?
Thank you for your feedback!
Your input helps us make this article better.
Still need help?
Contact support →Related articles
Understanding Agent Instructions
Learn how to configure Widgion agent instructions, define your AI assistant's behaviour, and guide its responses to customer questions.
Training Your AI Assistant
Learn how to train your Widgion AI assistant using websites, documents, text snippets, and other supported knowledge sources.
Installing the Chat Widget on Your Website
Step-by-step guide to embedding the chat widget on your website.
Adding, Editing, and Managing Contact Data
Handles actions like adding contacts, editing details, deleting, and exporting.
On this page