
Configuring Proactive Triggers
Learn how to configure proactive triggers in Widgion to initiate timely customer interactions based on supported events, conditions, and automation rules.
Proactive Triggers let you engage website visitors automatically based on their behaviour. You can create rules that send a message, hide the chat widget, or open the chat window when visitors meet specific conditions, such as spending time on a page or preparing to leave your website.
Understanding the Proactive Triggers Page
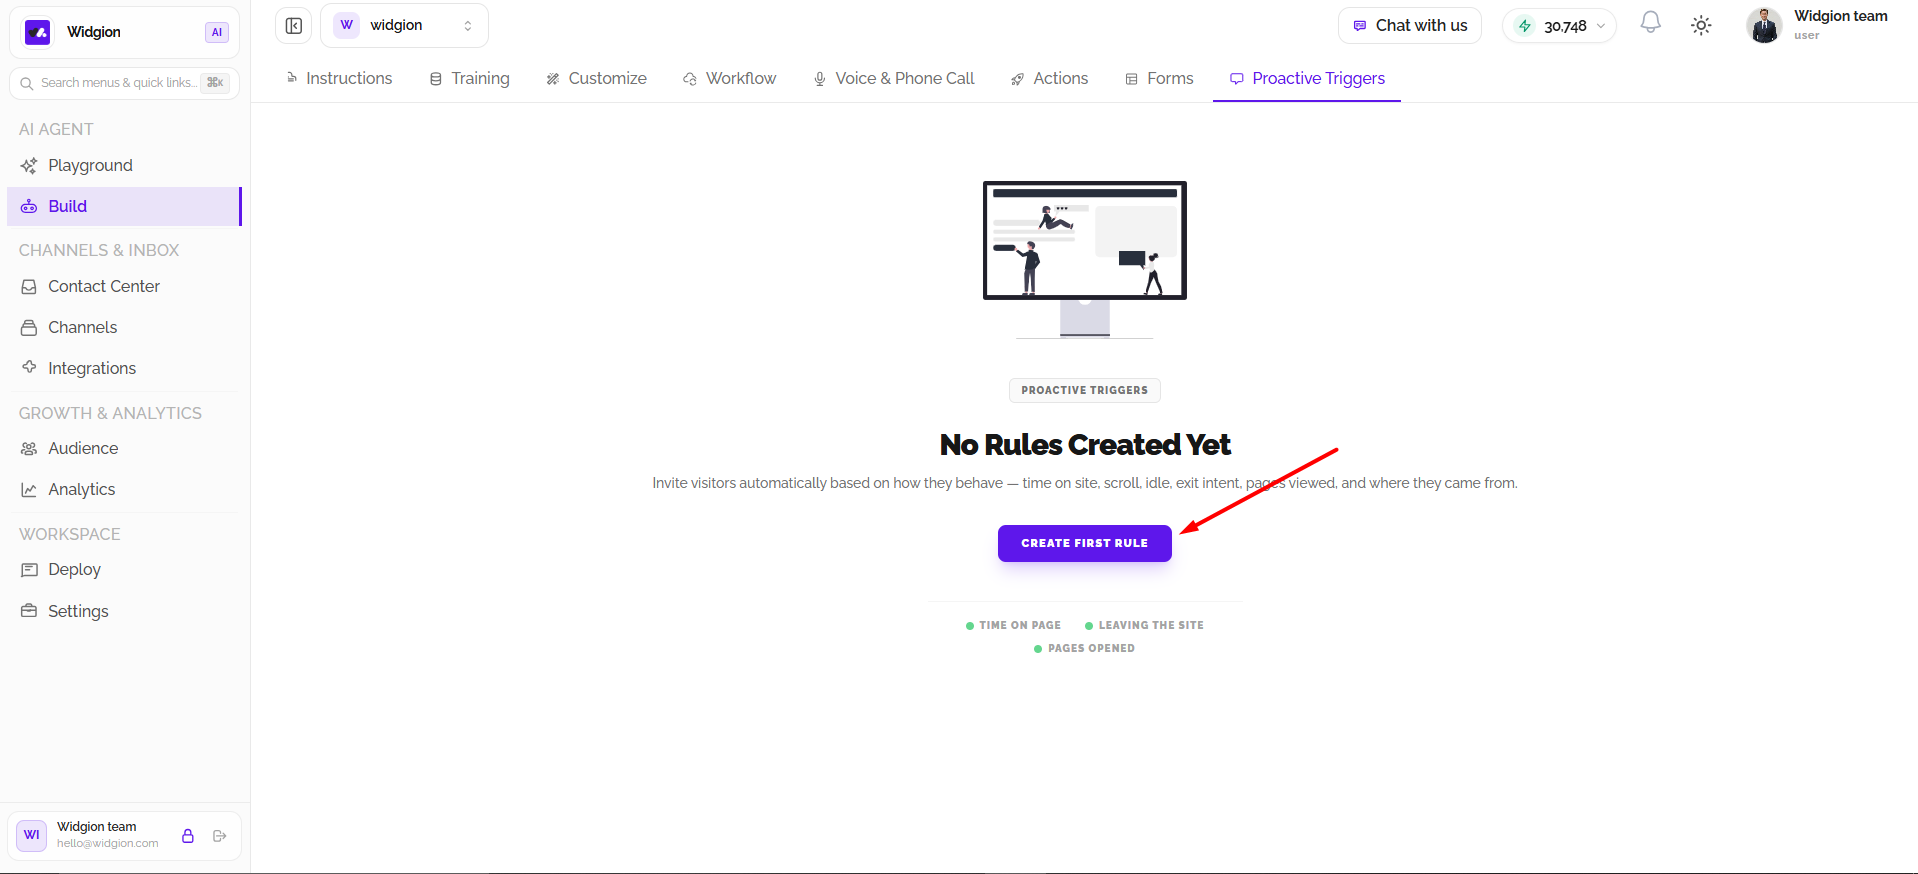
The Proactive Triggers page displays your existing rules. When no rules have been created, Widgion shows an empty state with No Rules Created Yet and a Create First Rule button. Select this button to start creating your first trigger.
The page highlights example trigger behaviours, including time on page, leaving the site, and pages opened. These behaviours can help you decide when an automated interaction should occur.
Creating a Trigger Rule
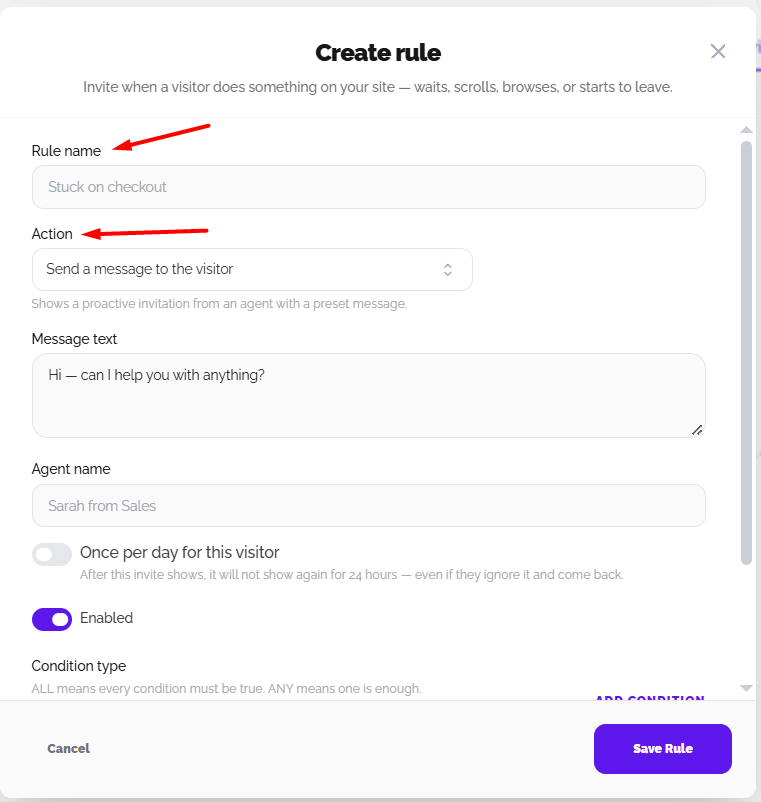
Select Create First Rule to open the rule configuration window. Enter a Rule Name that clearly identifies the purpose of the trigger, such as “Stuck on checkout.” This name helps you recognize and manage the rule later.
Choose an Action to determine what Widgion should do when the visitor meets the conditions. Available actions include Send a message to the visitor, Hide the widget, and Open the chat window.
Configuring the Visitor Message
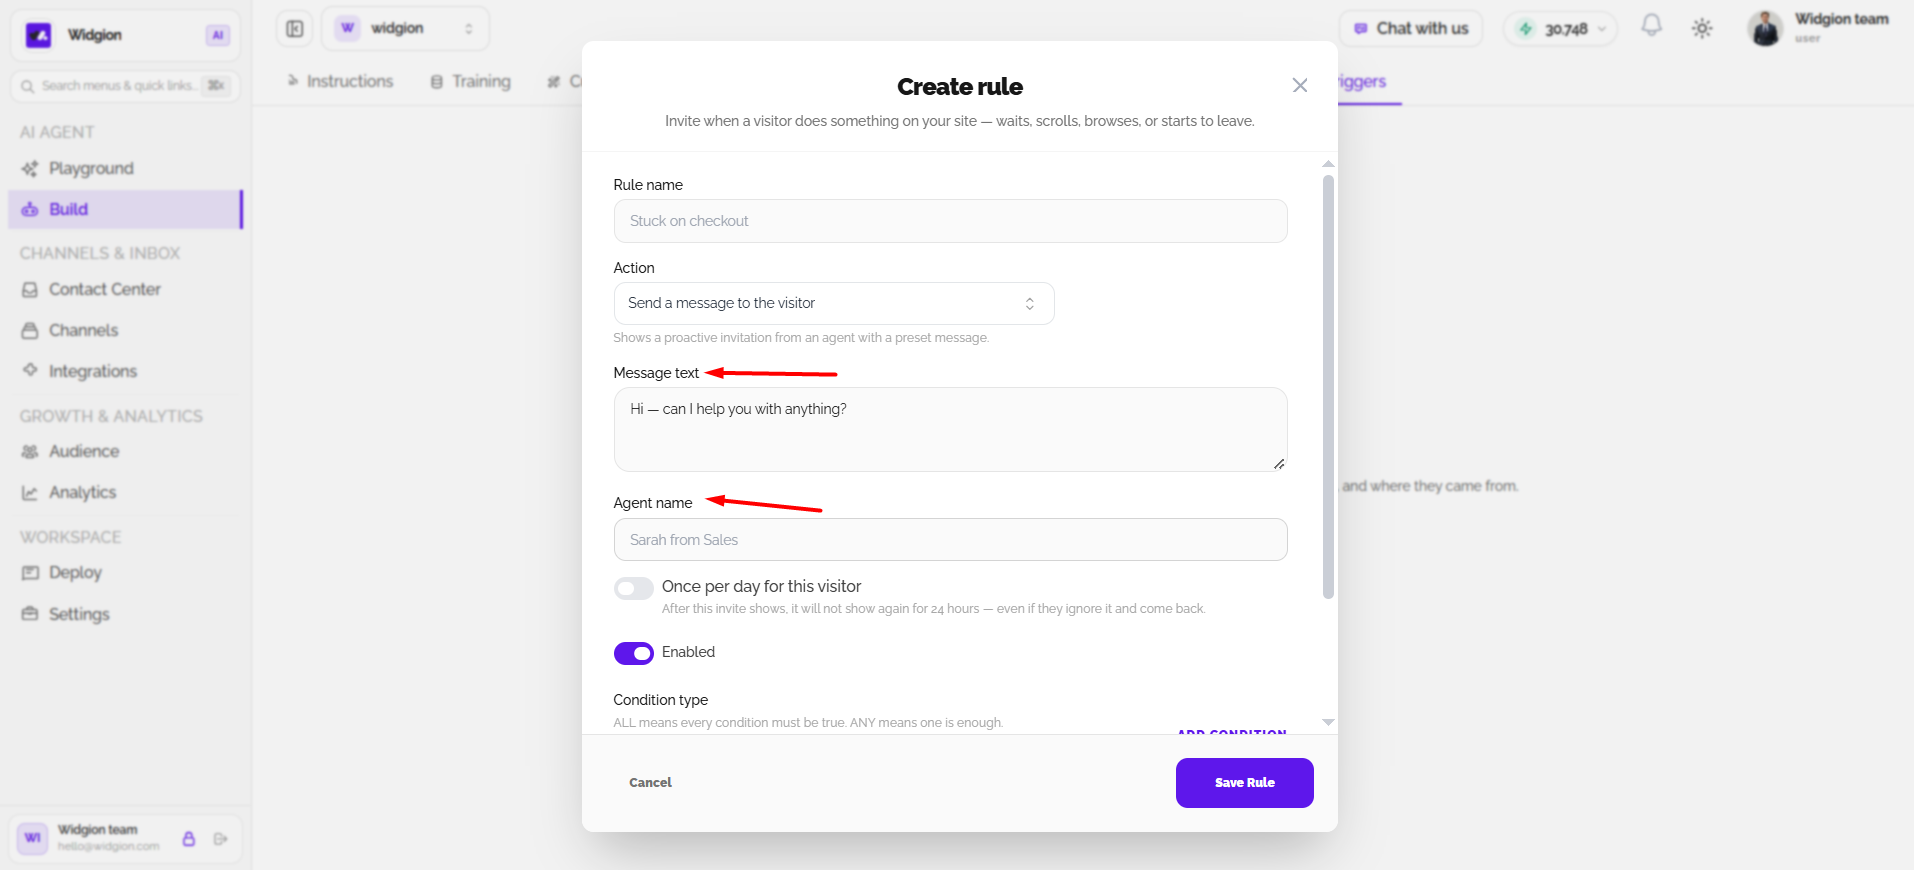
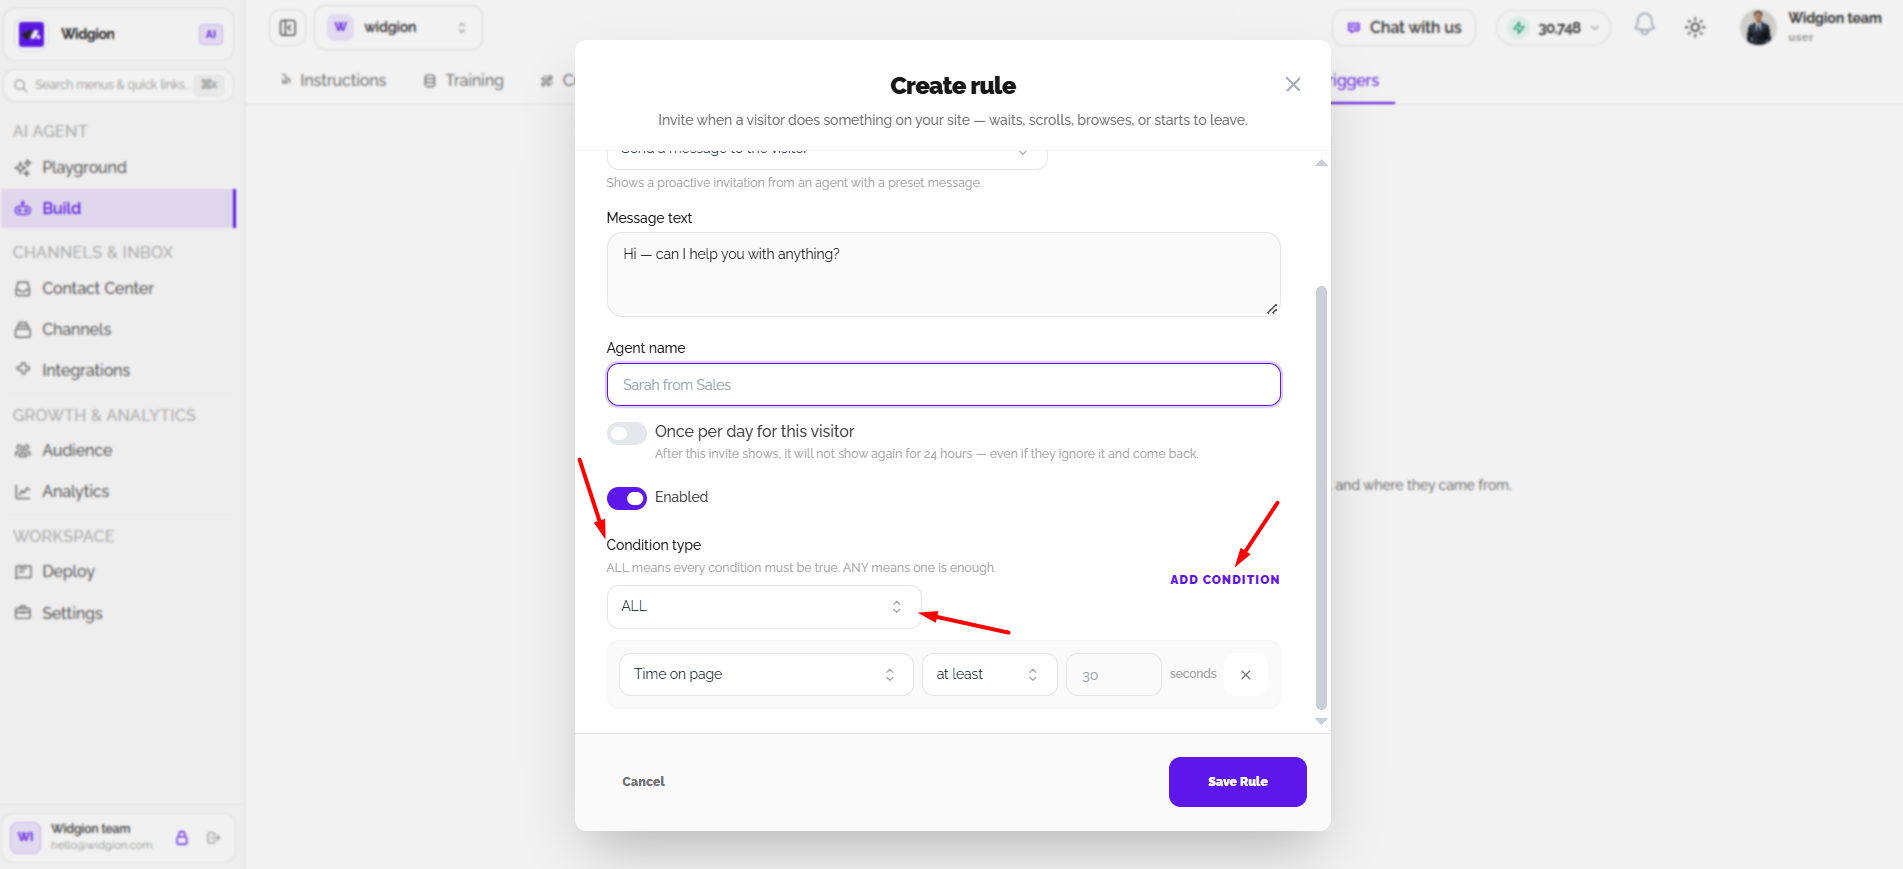
When Send a message to the visitor is selected, enter the message you want the visitor to receive in the Message text field. The message should be relevant to the visitor’s activity and encourage them to take the next step or request assistance.
You can also enter an Agent name, which identifies the agent associated with the invitation. These message settings are relevant when sending a proactive message; other actions, such as hiding the widget or opening the chat window, do not require the same message configuration.
Setting Frequency and Rule Status
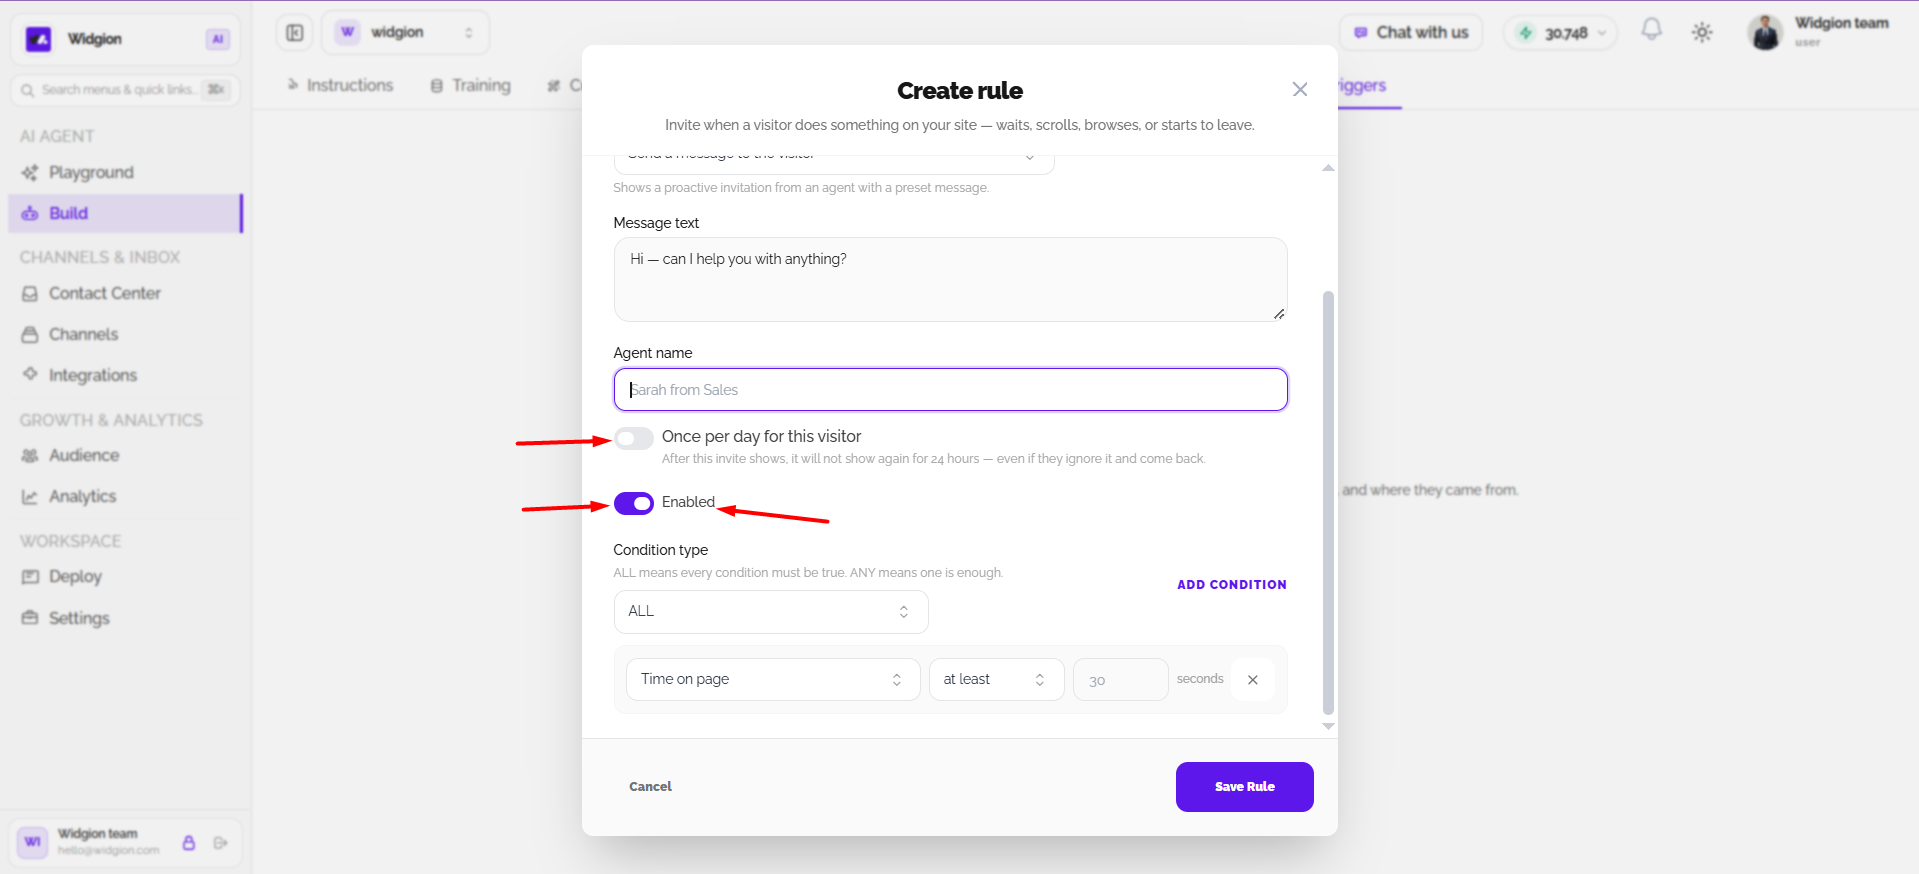
Enable Once per day for this visitor to limit the invitation to one display per visitor within a 24-hour period. After the invitation appears, it will not be shown again for 24 hours even if the visitor ignores it and returns.
Use the Enabled toggle to activate or deactivate the rule. A disabled rule remains configured but will not run until it is enabled again.
Adding Conditions
Conditions define the visitor behaviour that must occur before the rule runs. Choose ALL when every condition must be true, or ANY when at least one condition is enough. Use Add Condition to include additional requirements.
Select a condition from the dropdown and configure its operator and value. The visible condition options include Time on page, Time on site, Time since the last proactive invitation, Time since the chat window was closed, Time since the visitor’s first message, URL of the current page, and Title of the page. For example, a rule can use Time on page at least 30 seconds to trigger after a visitor has spent 30 seconds on a page.
Saving Your Rule
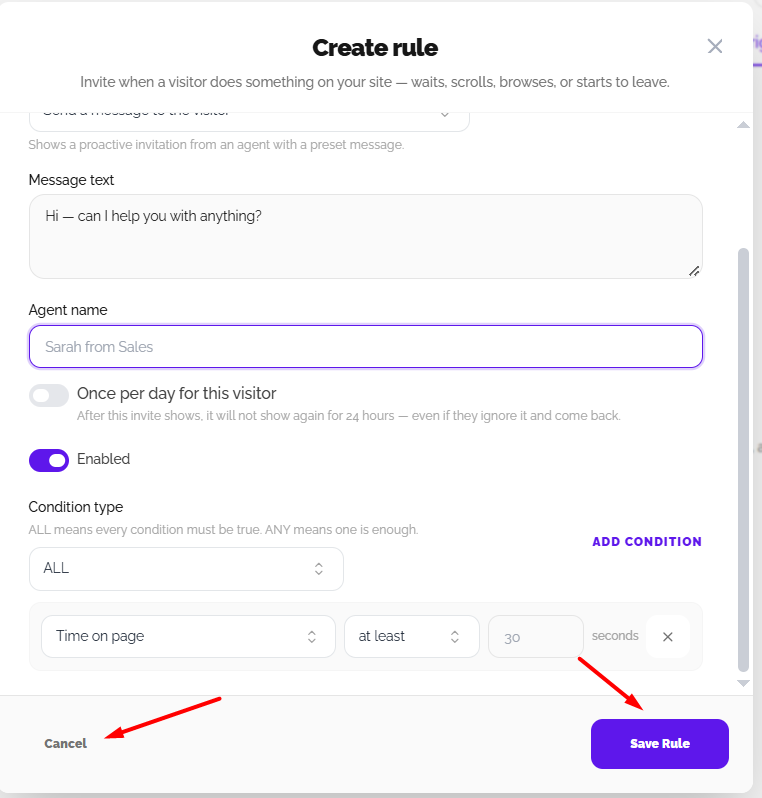
Review the rule name, action, message settings, frequency, enabled status, and conditions. Select Save Rule to save the configuration. Use Cancel to leave without saving.
Summary
Proactive Triggers help you engage visitors based on their website activity. Create a rule, choose an action, configure any message details, set the conditions and frequency, and save the rule to automate visitor interactions.
Did this answer your question?
What was missing or unclear?
Thank you for your feedback!
Your input helps us make this article better.
Still need help?
Contact support →Related articles
Understanding Agent Instructions
Learn how to configure Widgion agent instructions, define your AI assistant's behaviour, and guide its responses to customer questions.
Training Your AI Assistant
Learn how to train your Widgion AI assistant using websites, documents, text snippets, and other supported knowledge sources.
Installing the Chat Widget on Your Website
Step-by-step guide to embedding the chat widget on your website.
Adding, Editing, and Managing Contact Data
Handles actions like adding contacts, editing details, deleting, and exporting.
On this page