
Connecting to Widgion Through the API
Explore Widgion’s API deployment options and learn how to connect your application to Widgion using the available API documentation, configuration details, and integration requirements.
Widgion’s API deployment settings allow you to launch and control widgets programmatically using JavaScript. From the Deploy section, you can select a widget type, choose how it should open, copy the installation script, and use generated API commands to control its behavior.
This section also provides options for configuring proactive invitations.
Accessing the API Deployment Settings
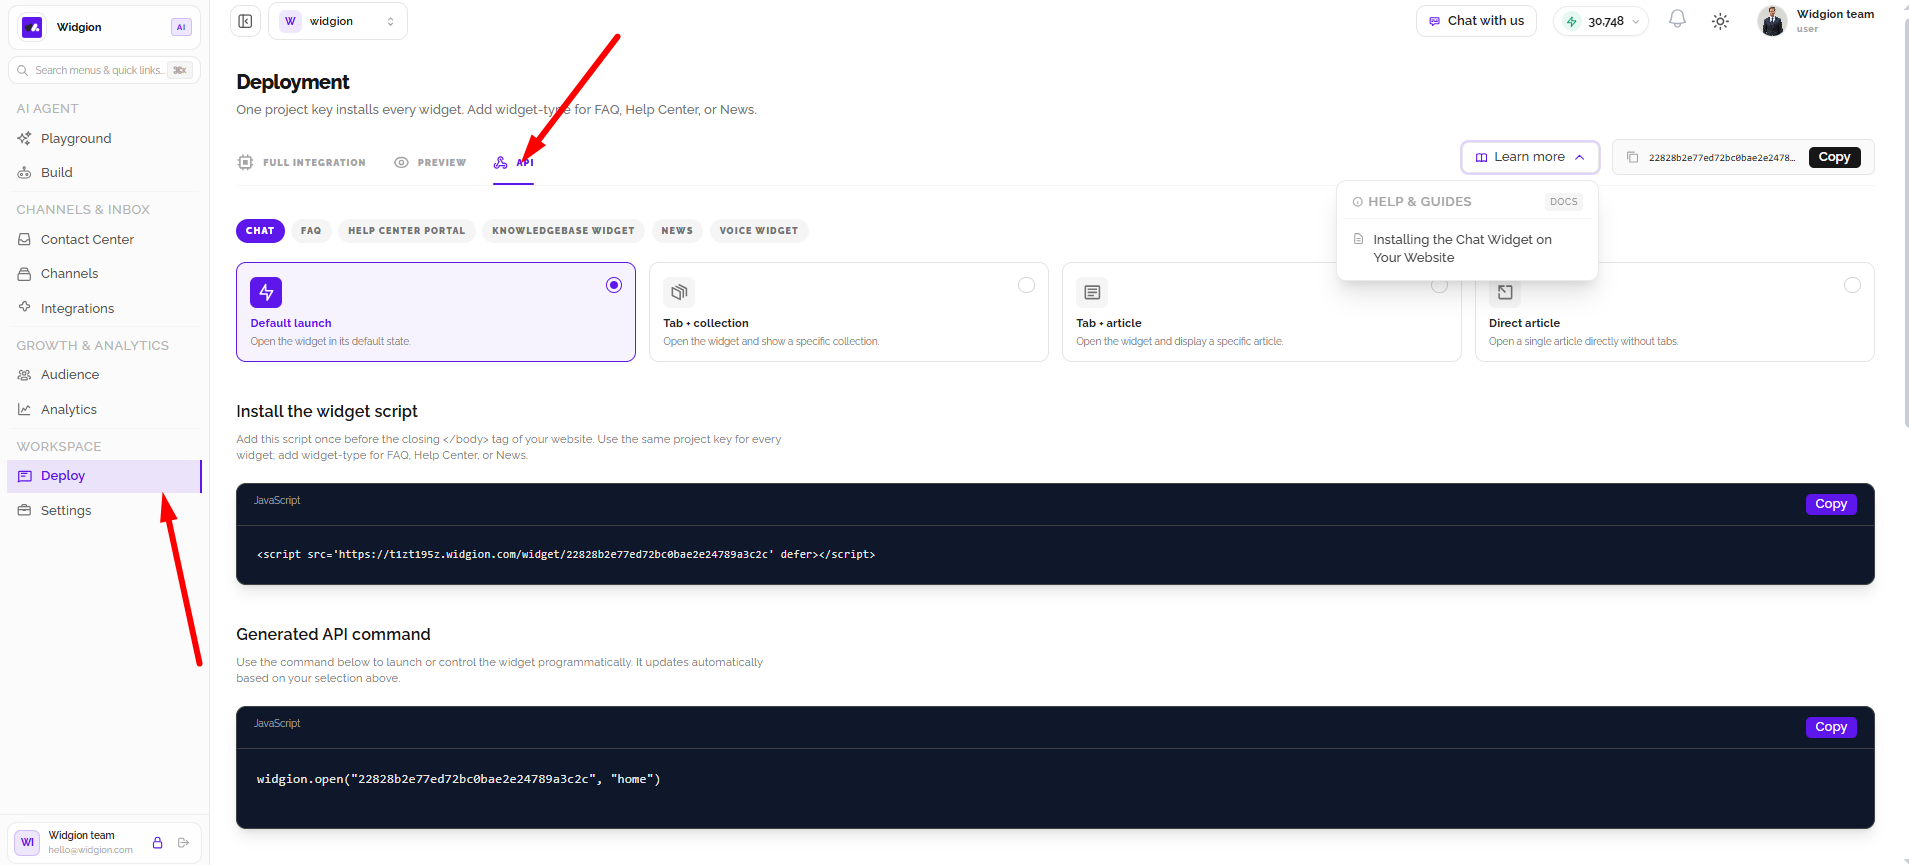
Navigate to Deploy in the left-hand menu and select the API tab. The Deployment page explains that one project key can be used to install every widget, with the widget type specified for FAQ, Help Center, or News.
Selecting a Widget Type
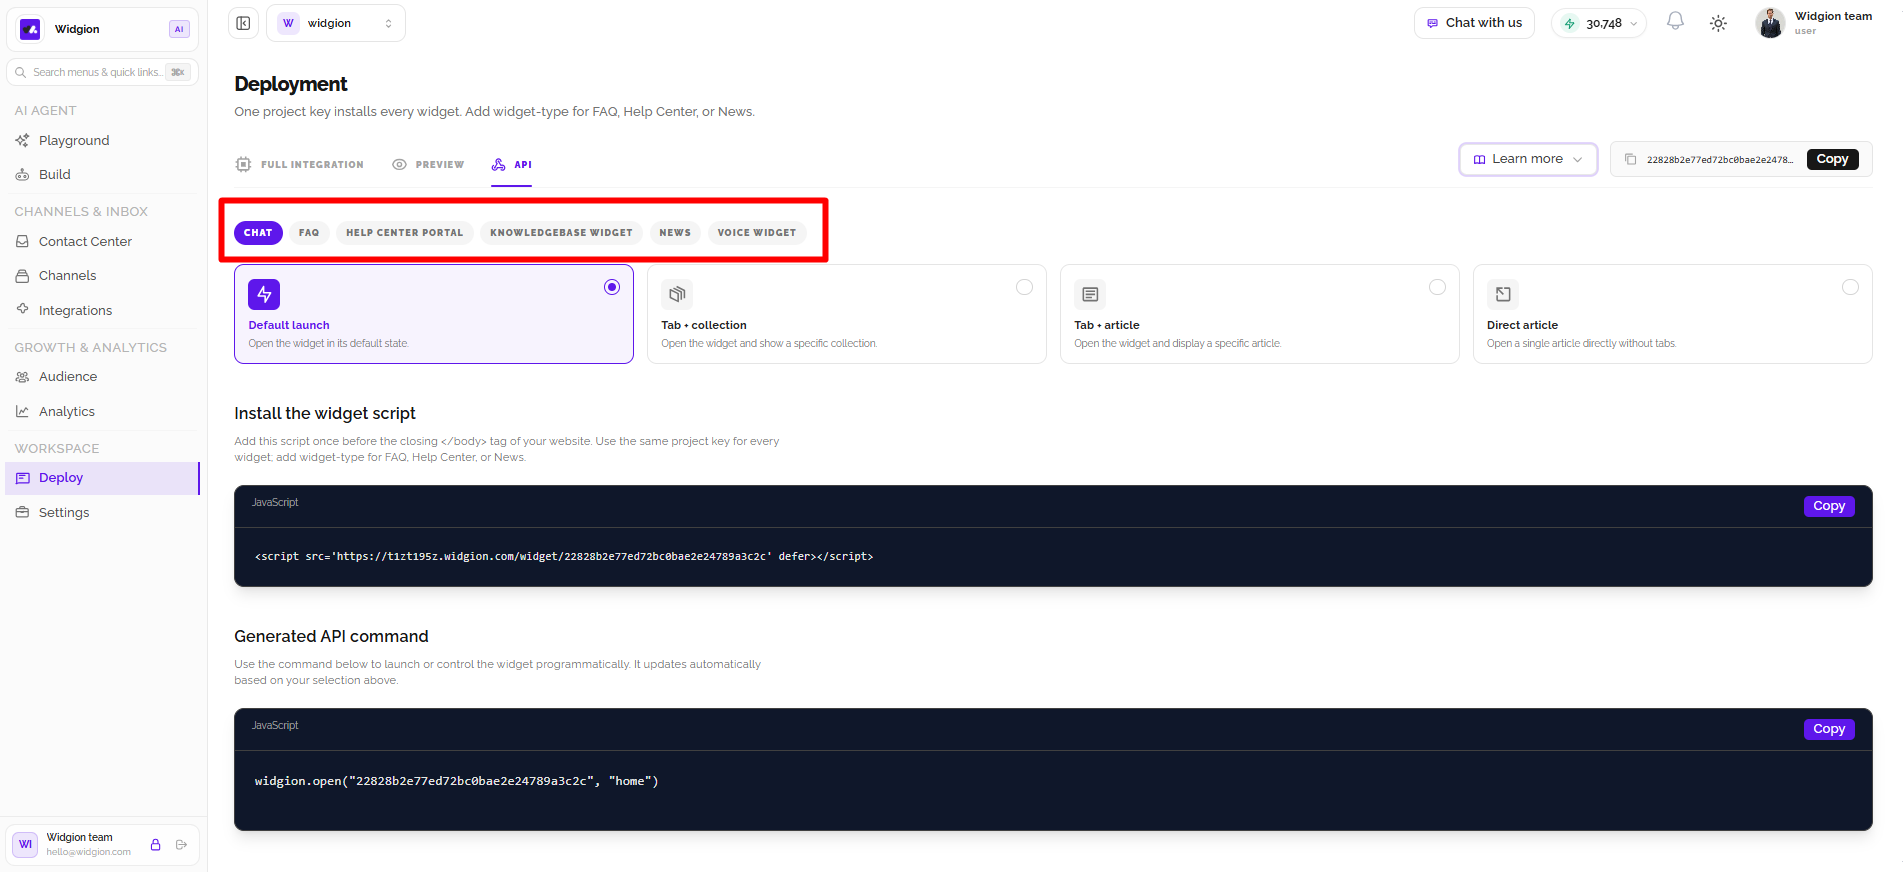
The API page provides widget-type tabs for Chat, FAQ, Help Center Portal, Knowledgebase Widget, News, and Voice Widget. Select the widget you want to configure before choosing how it should launch.
Choosing How the Widget Opens
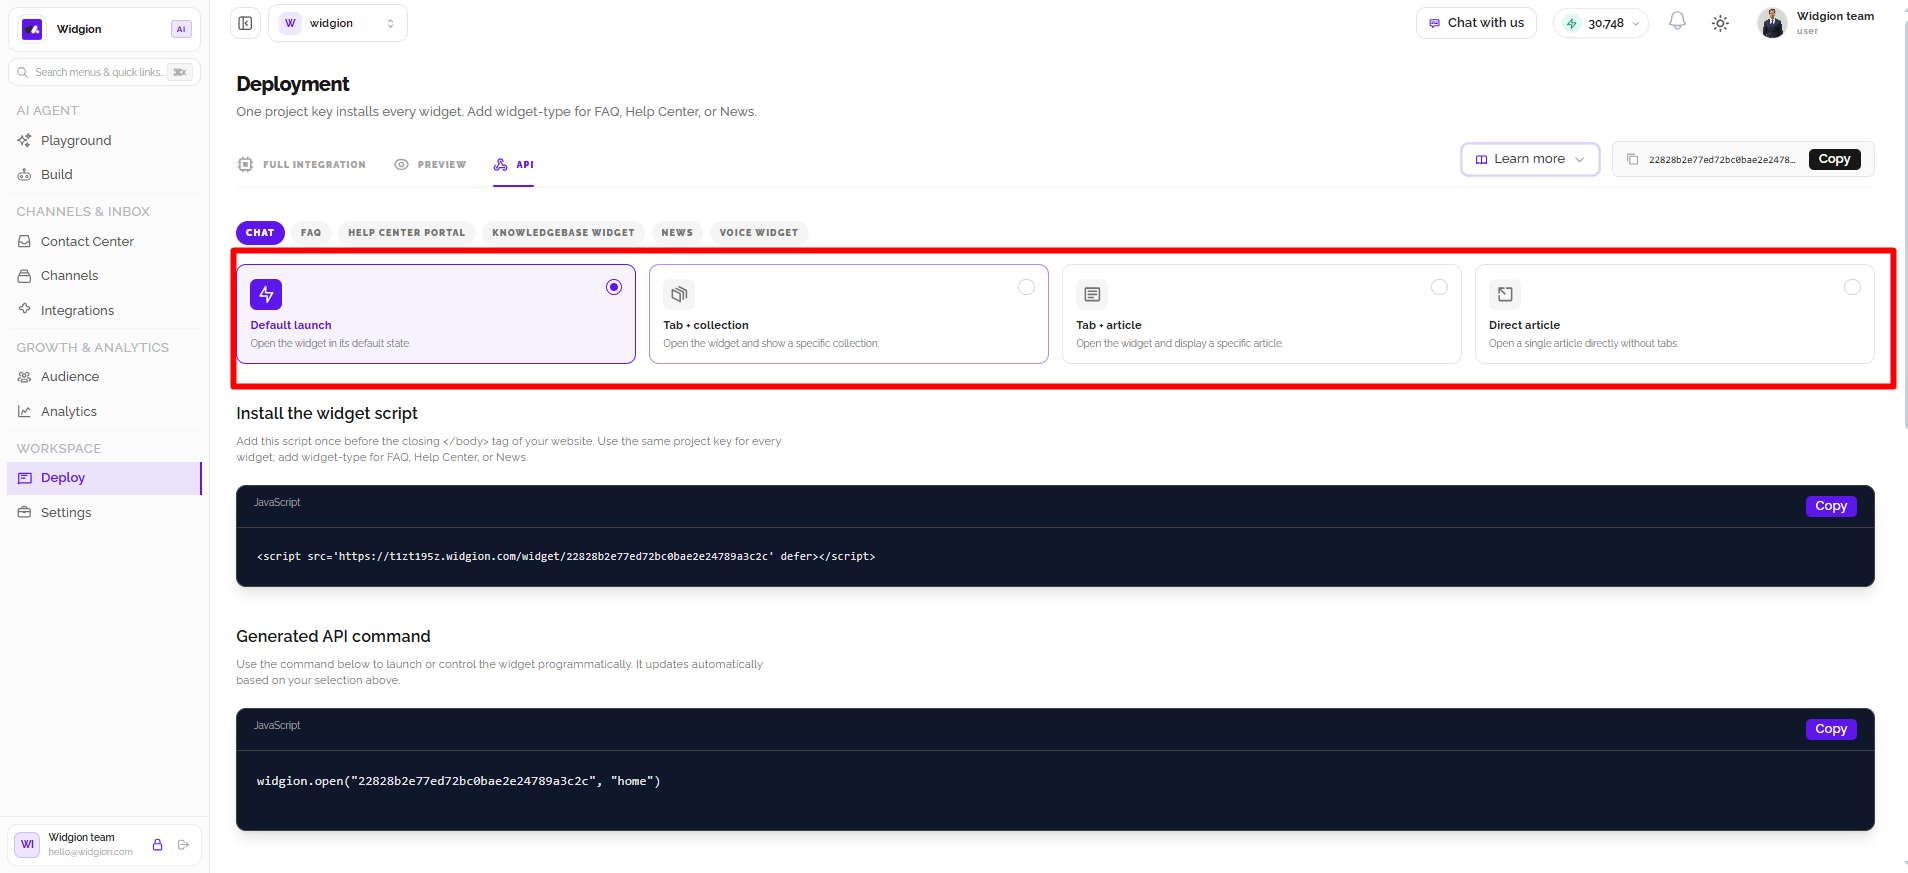
Widgion provides different launch options depending on how you want visitors to access the widget.
Default launch opens the widget in its default state. Tab + collection opens the widget and displays a specific collection, while Tab + article opens the widget and displays a selected article. Direct article opens a single article directly without displaying tabs.
Installing the Widget Script
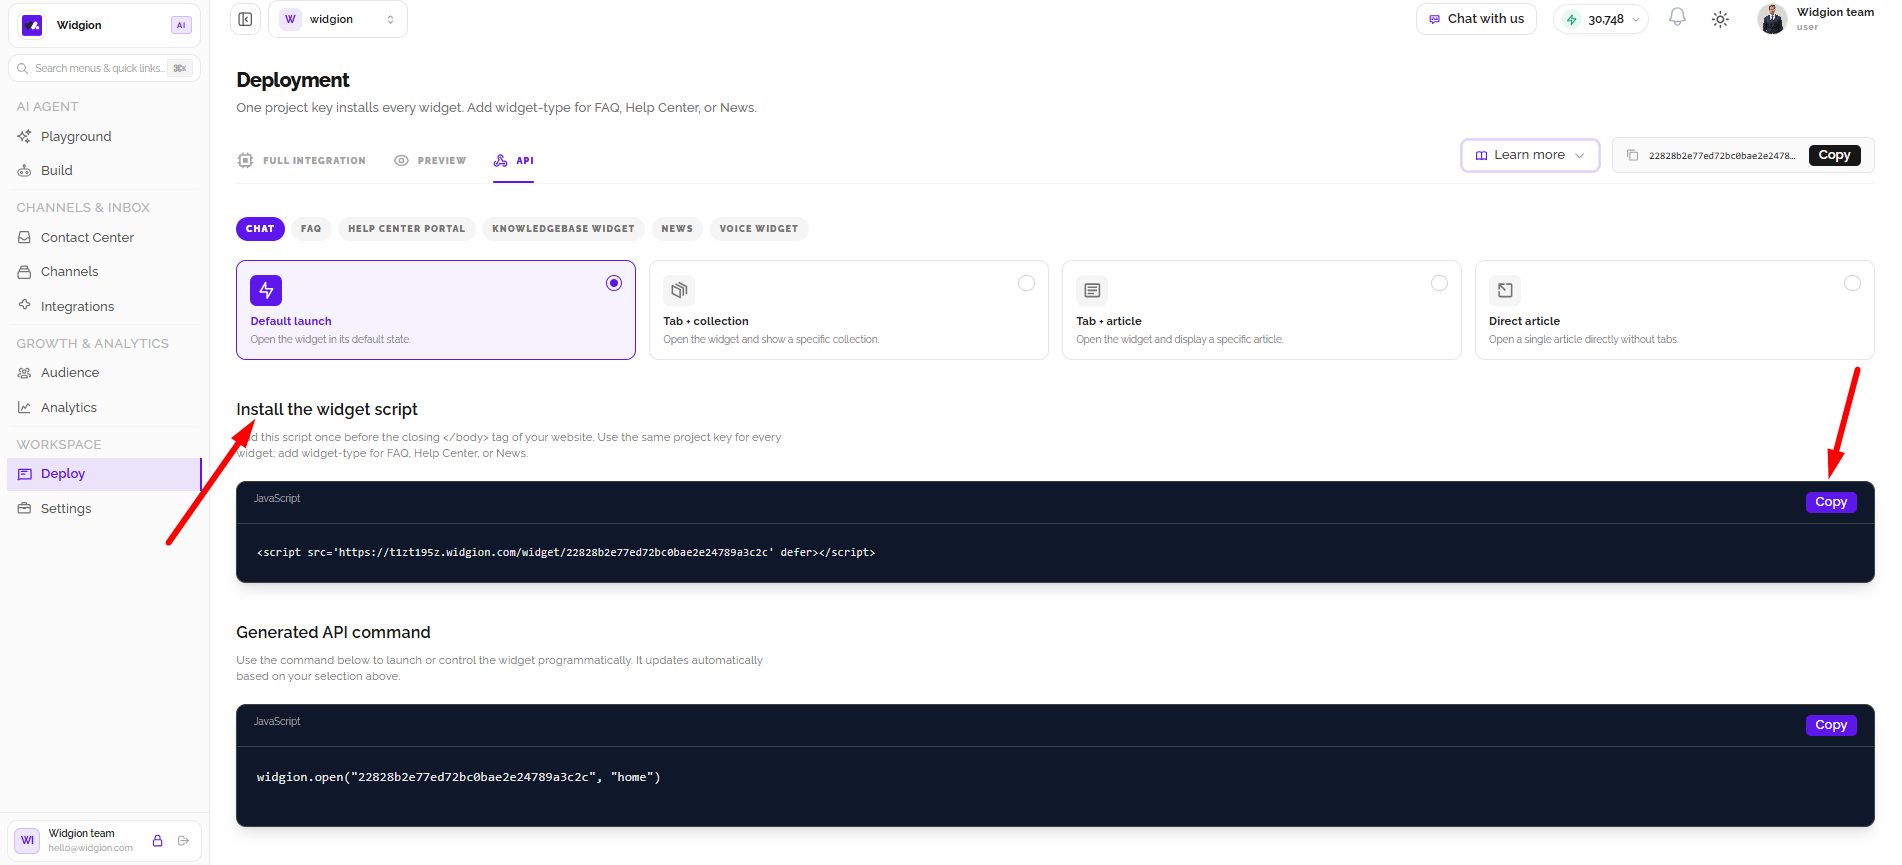
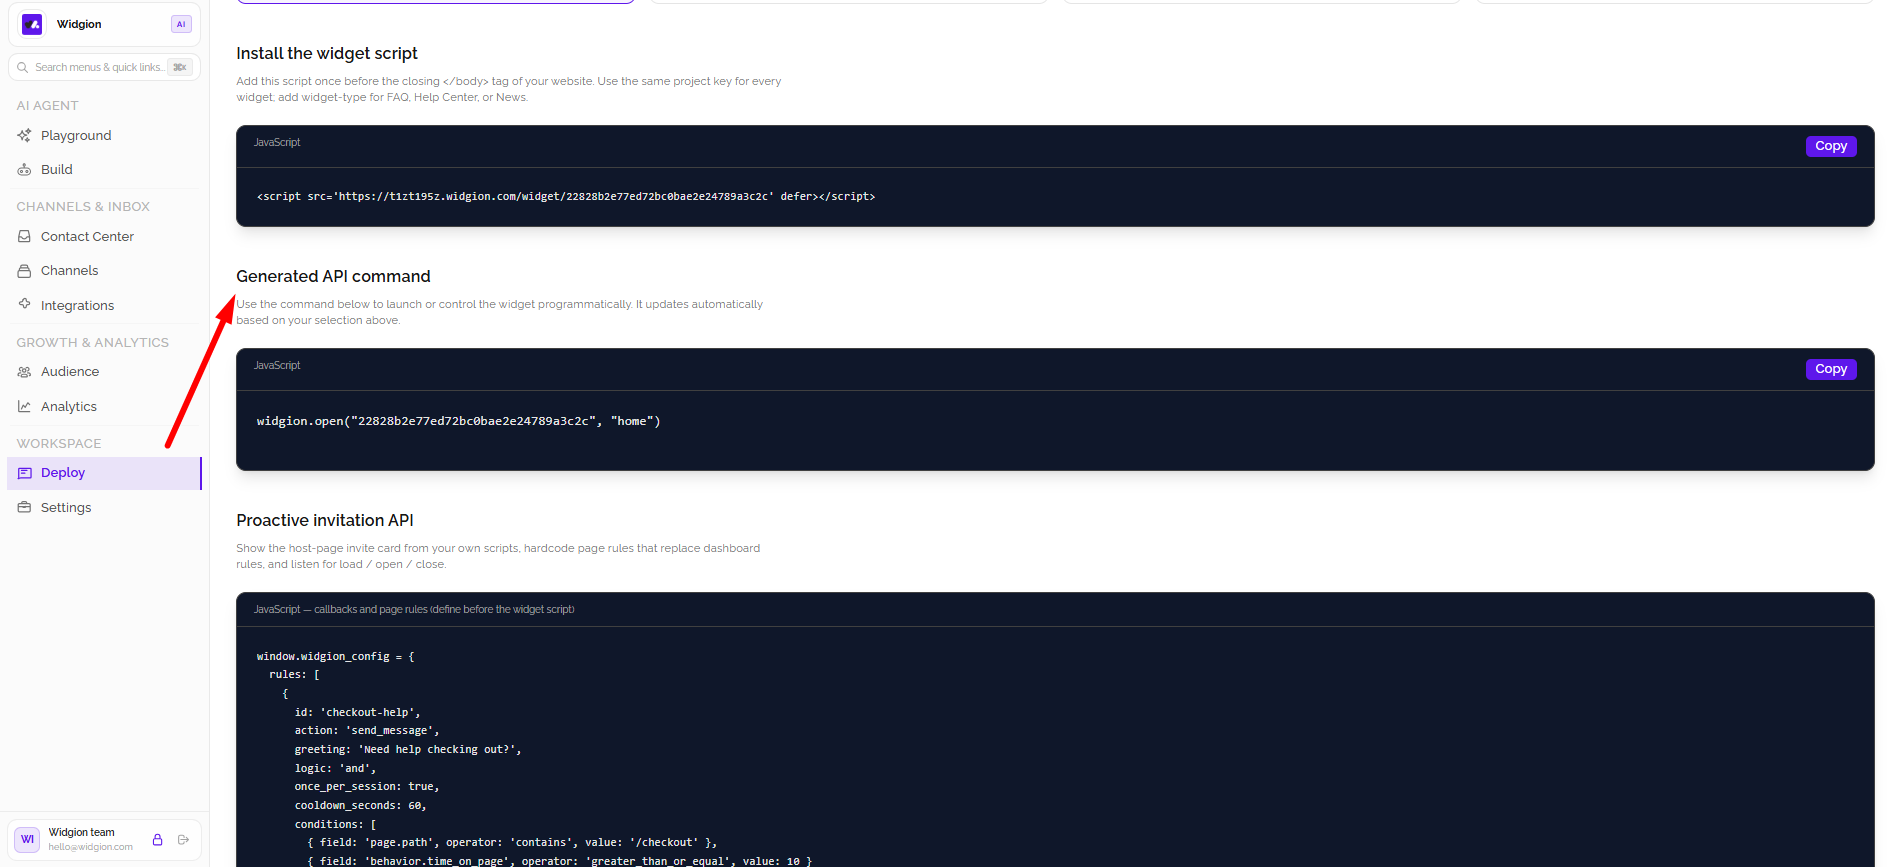
The Install the widget script section provides the JavaScript snippet required to install the widget on your website. Add the script once, before the closing </body> tag. The same project can be used for every widget, with the widget type selected as needed.
Use the Copy button to copy the installation script from the code block.
Using the Generated API Command
The Generated API command section displays the JavaScript command used to launch or control the widget programmatically. The command updates automatically based on the widget type and launch option selected above.
Copy the generated command and use it in your website’s JavaScript wherever you need to open the configured widget.
Accessing API Documentation
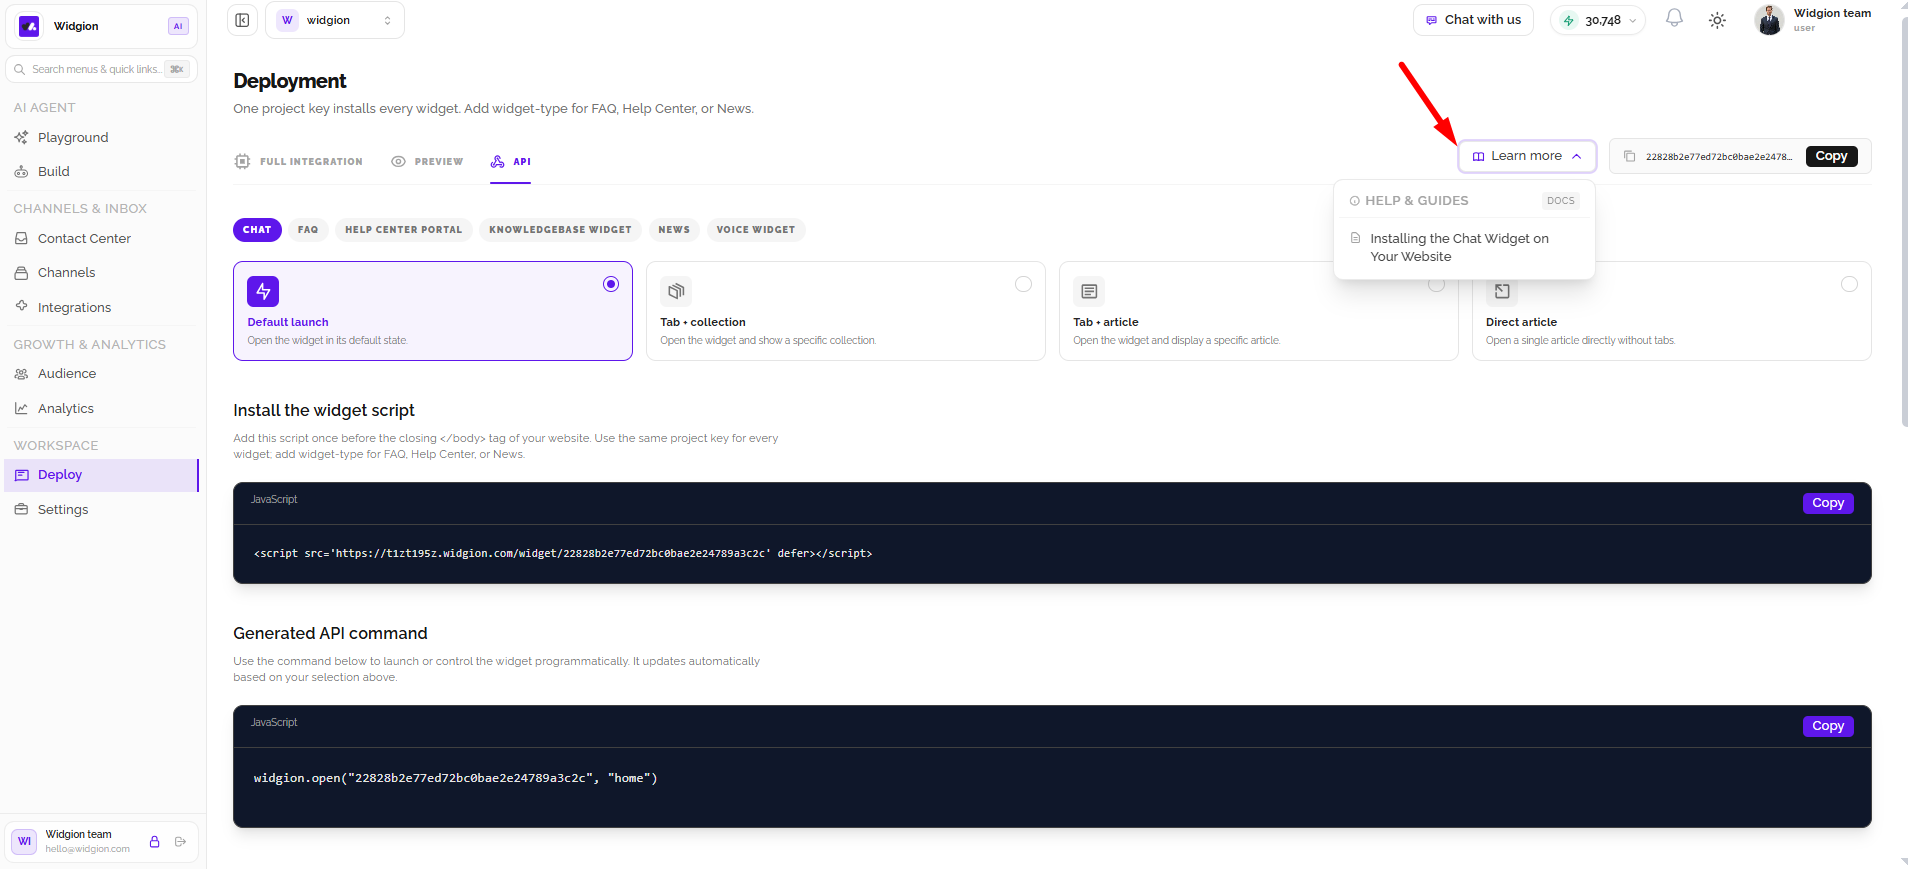
The Learn more dropdown provides access to help documentation. In the screenshot, the available guide is Installing the Chat Widget on Your Website.
Use this resource when you need additional instructions for installing the widget.
Configuring Proactive Invitations
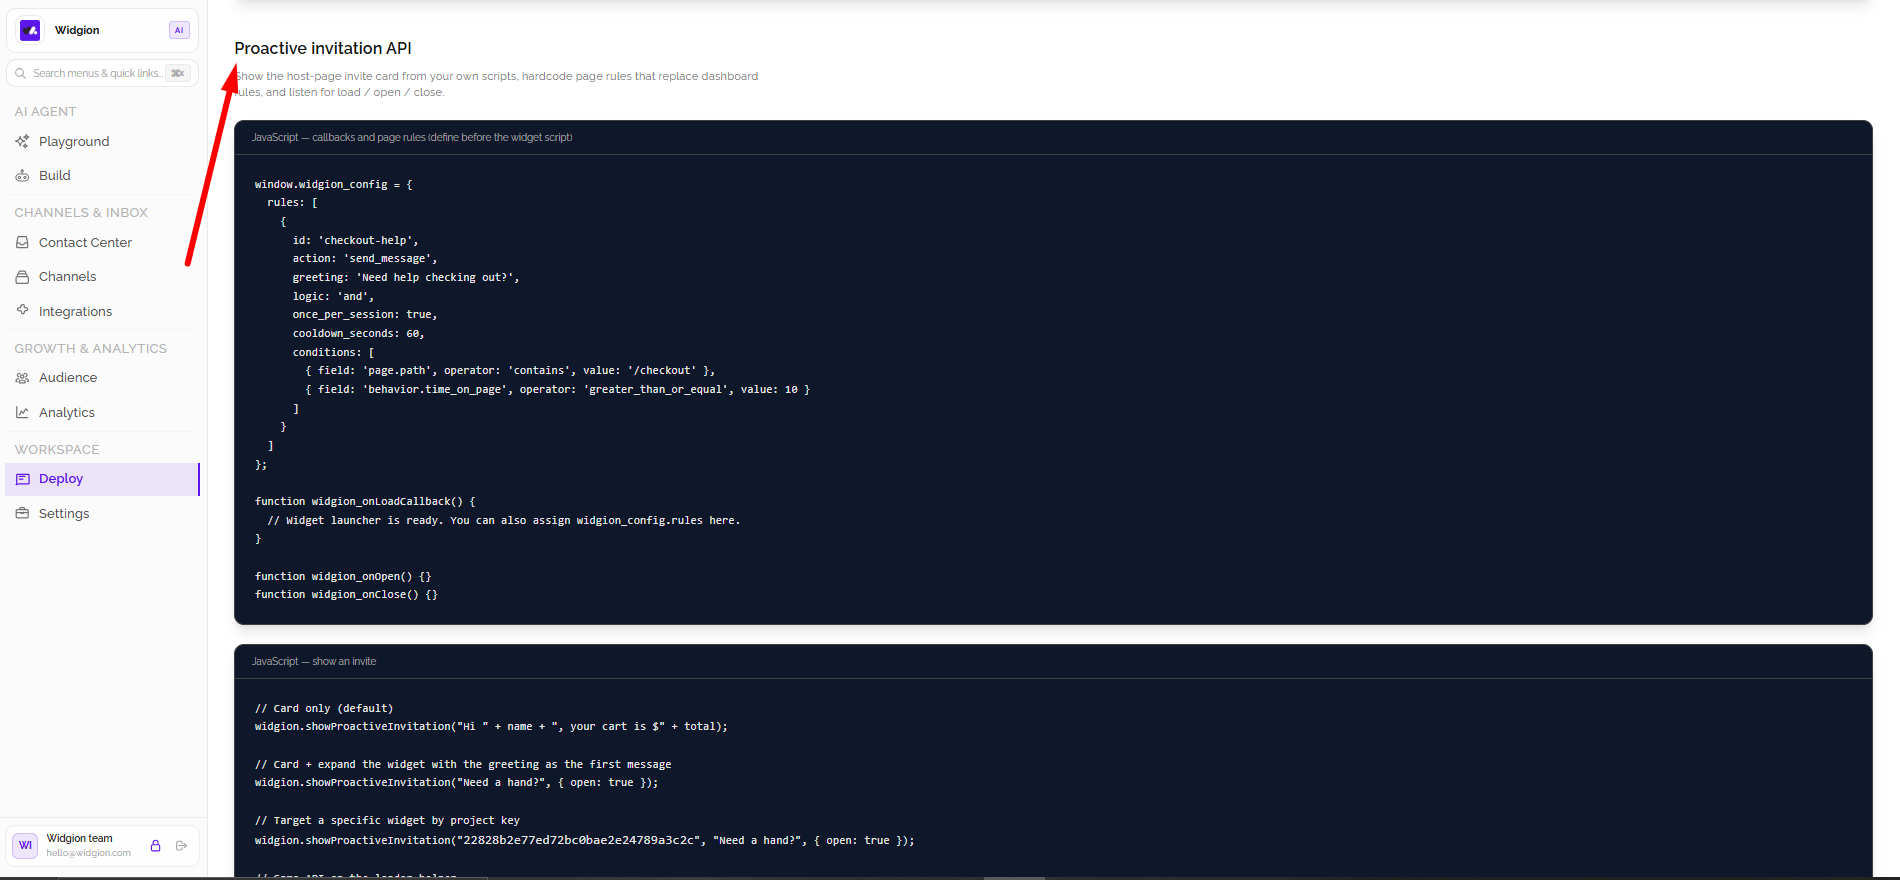
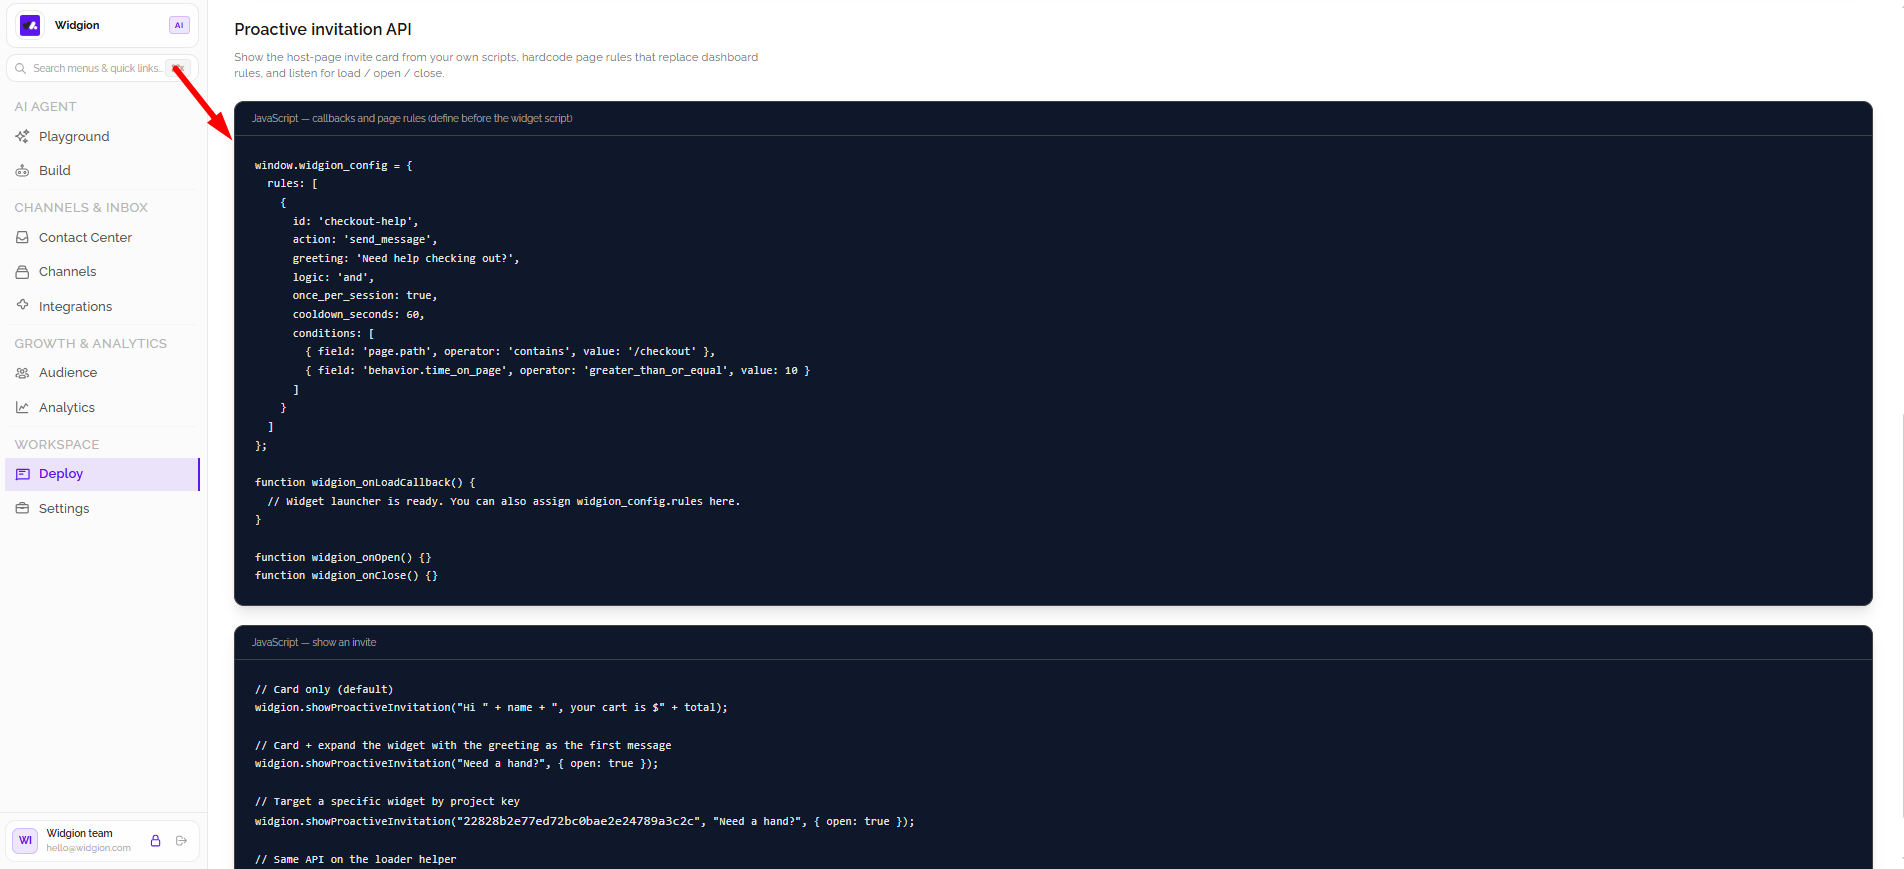
The Proactive invitation API section allows you to display an invitation card from your own scripts. It also supports defining page rules that replace dashboard rules and listening for widget load, open, and close events.
The configuration example includes rules with an ID, action, greeting, topic, session limit, cooldown period, and conditions. The conditions shown can target a page path or visitor behavior, such as time spent on a page.
Displaying a Proactive Invitation
The code examples demonstrate different ways to display a proactive invitation. You can show an invitation card by itself, open the widget with a greeting as the first message, or target a specific widget using its project key.
The examples also show how to call the proactive invitation API through the Widgion loader helper.
Controlling Widgion Through the API
Use the API deployment options to choose how your widget opens, copy the installation script, and generate the appropriate JavaScript command. Proactive invitations provide additional control over how and when visitors are prompted to interact with Widgion.
Review your selected widget type and launch behavior before copying the generated commands and adding them to your website.
Did this answer your question?
What was missing or unclear?
Thank you for your feedback!
Your input helps us make this article better.
Still need help?
Contact support →Related articles
Integrating Widgion with Your Website
Learn how to integrate Widgion with your website using the available deployment options and prepare your AI assistant to interact with website visitors.
Previewing Your Widgion Widgets
Learn how to preview your Widgion deployment, inspect how your AI assistant appears and behaves, and check the experience before making it available to website visitors.
Installing the Chat Widget on Your Website
Step-by-step guide to embedding the chat widget on your website.
Adding, Editing, and Managing Contact Data
Handles actions like adding contacts, editing details, deleting, and exporting.
On this page