
Installing Widgets
Embed and launch your widgets on your website.
Installing widgets in Widgion allows you to seamlessly integrate your Knowledgebase, FAQ, and News & Release content directly into your website. Instead of directing users elsewhere, widgets bring helpful information and updates directly into your platform, making them instantly accessible.
By setting up your widget correctly, you ensure a smooth and efficient experience where users can browse content, find answers, and stay informed without interruption. This section guides you through the different installation methods available and how to implement each one.
 Installing Using the Widget Bubble
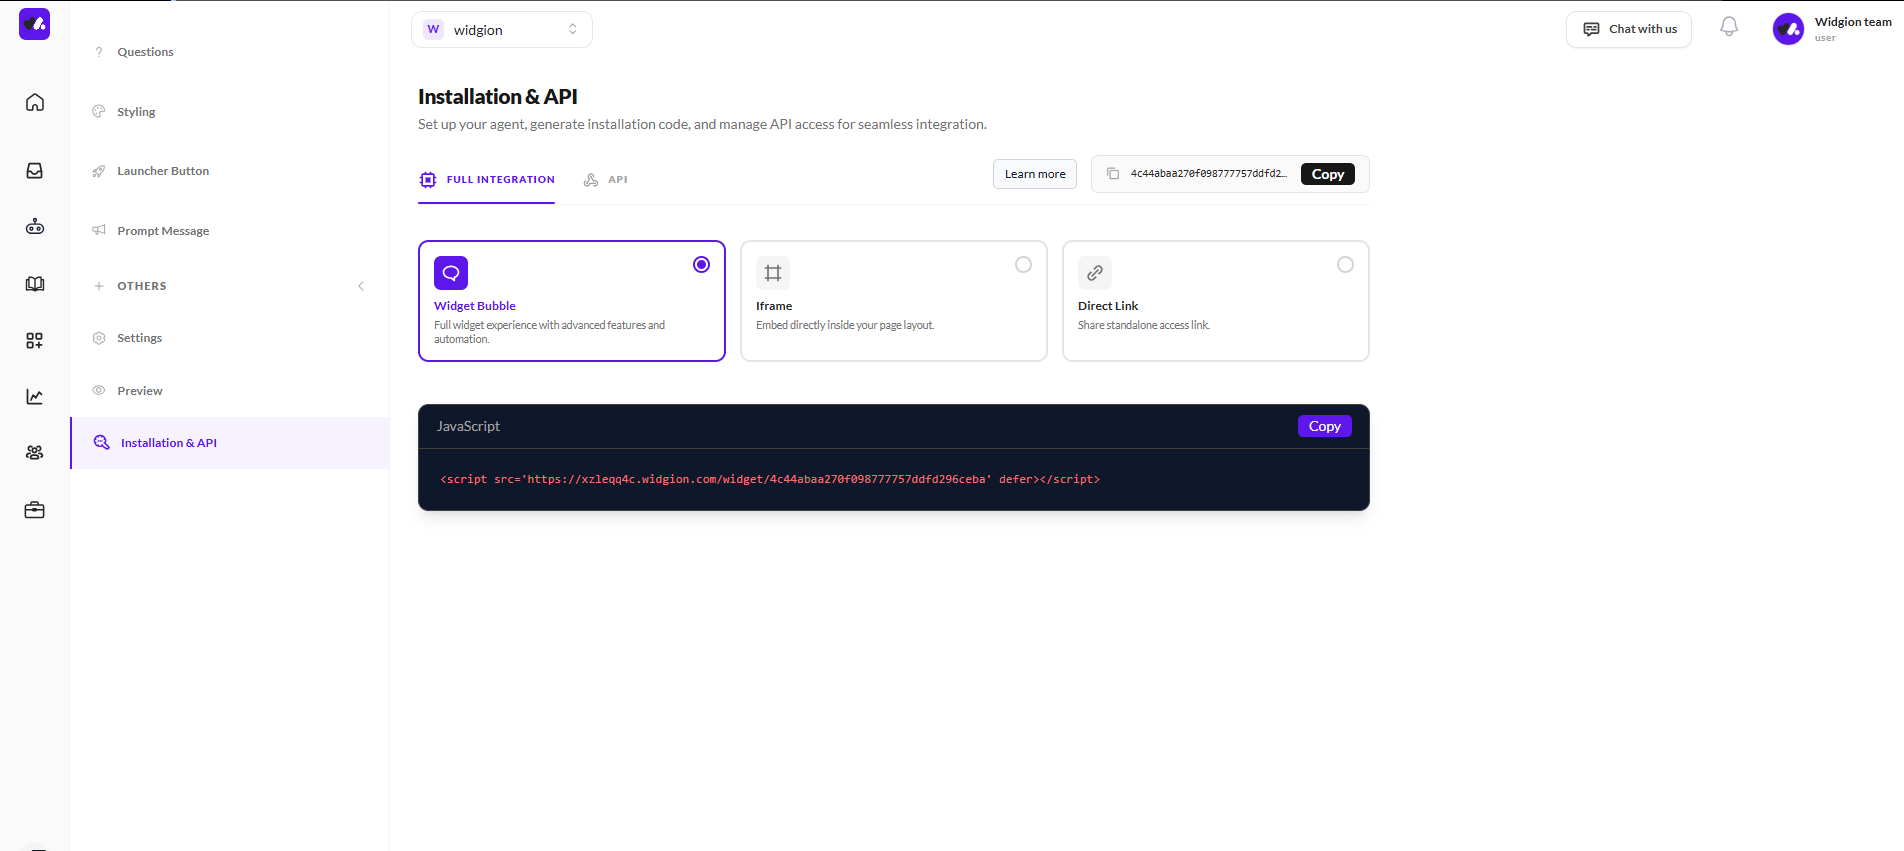
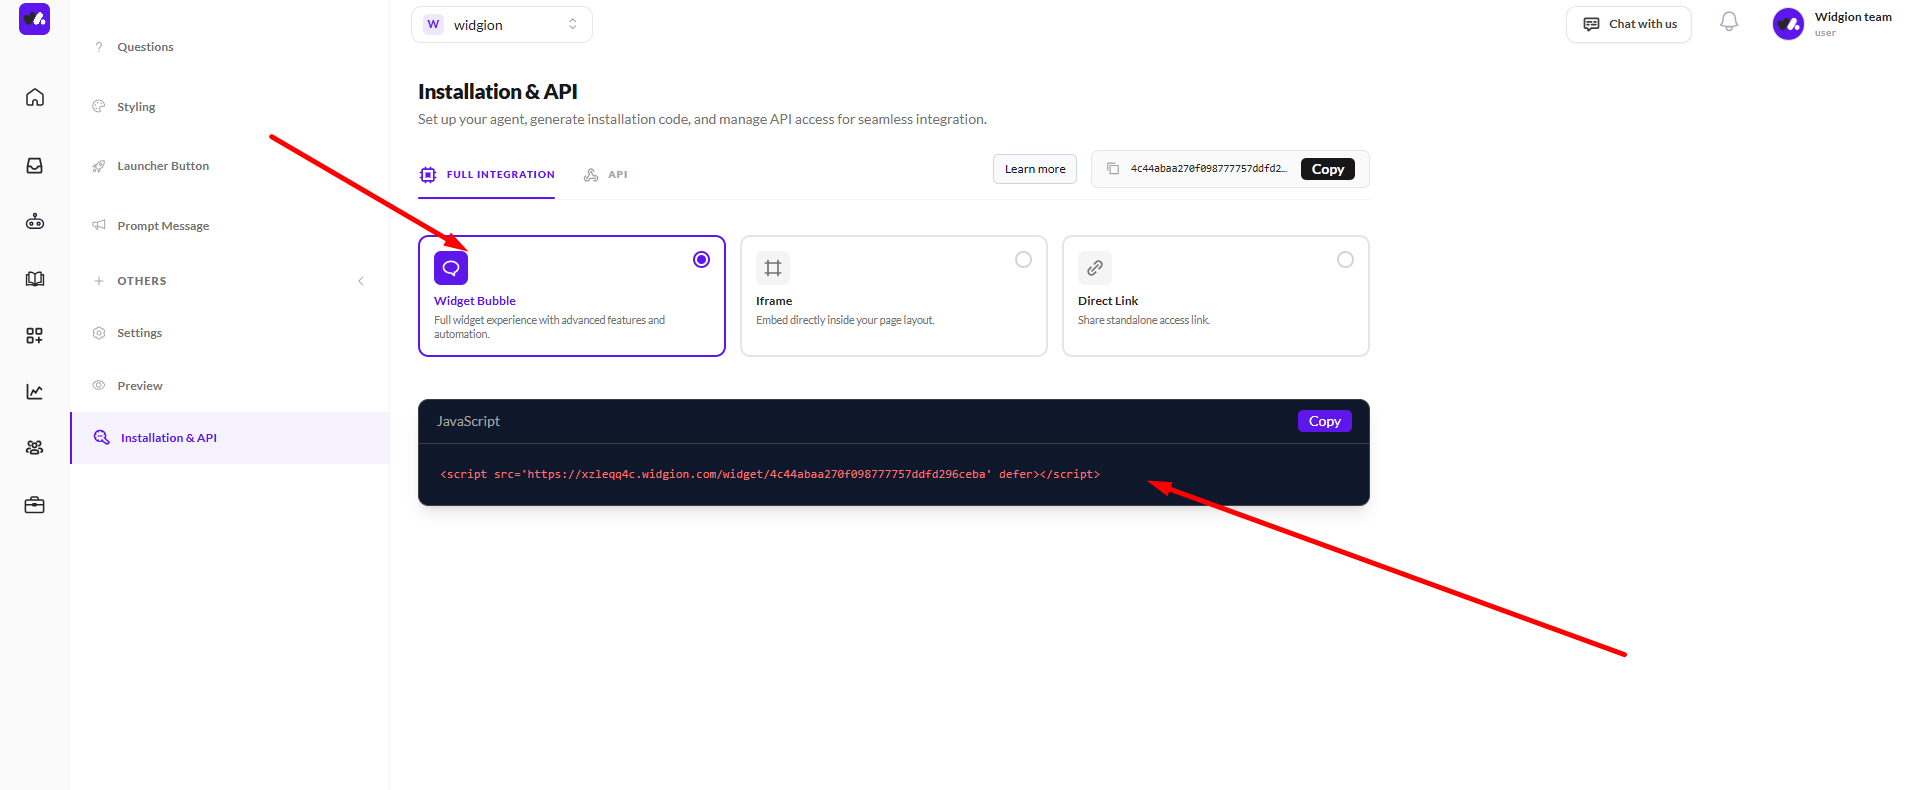
The Widget Bubble is the default and most commonly used installation method. It adds a floating widget to your website, allowing users to access your content from any page without disrupting their browsing experience.
To install it, select the Widget Bubble option and copy the generated JavaScript code. Paste this code into your website’s HTML, typically just before the closing </body> tag. Once added, the widget will appear on your site and automatically sync with your selected content source.
 Installing Using Iframe
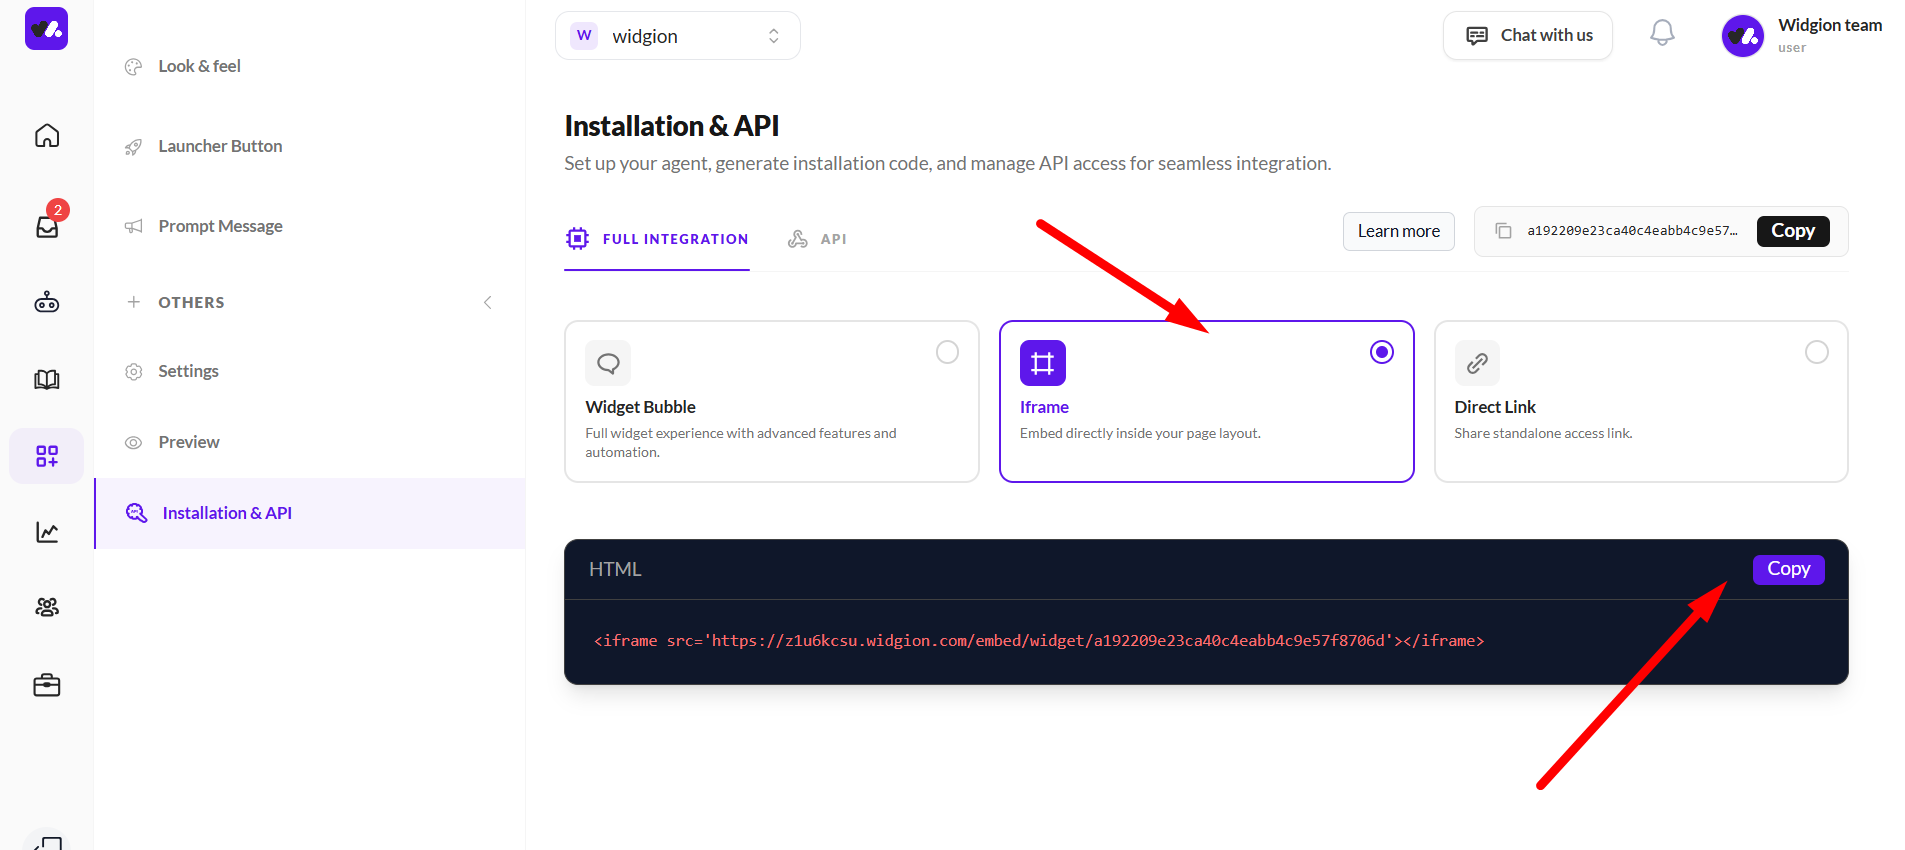
The Iframe method allows you to embed your widget directly within a specific section of your website. This is ideal when you want your content to appear as part of your page layout rather than as a floating element.
To install it, select the Iframe option and copy the generated embed code.
Paste this code into the section of your webpage where you want the widget to appear. Once implemented, your content will load seamlessly within your page while maintaining a consistent layout.
Installing Using Direct Link
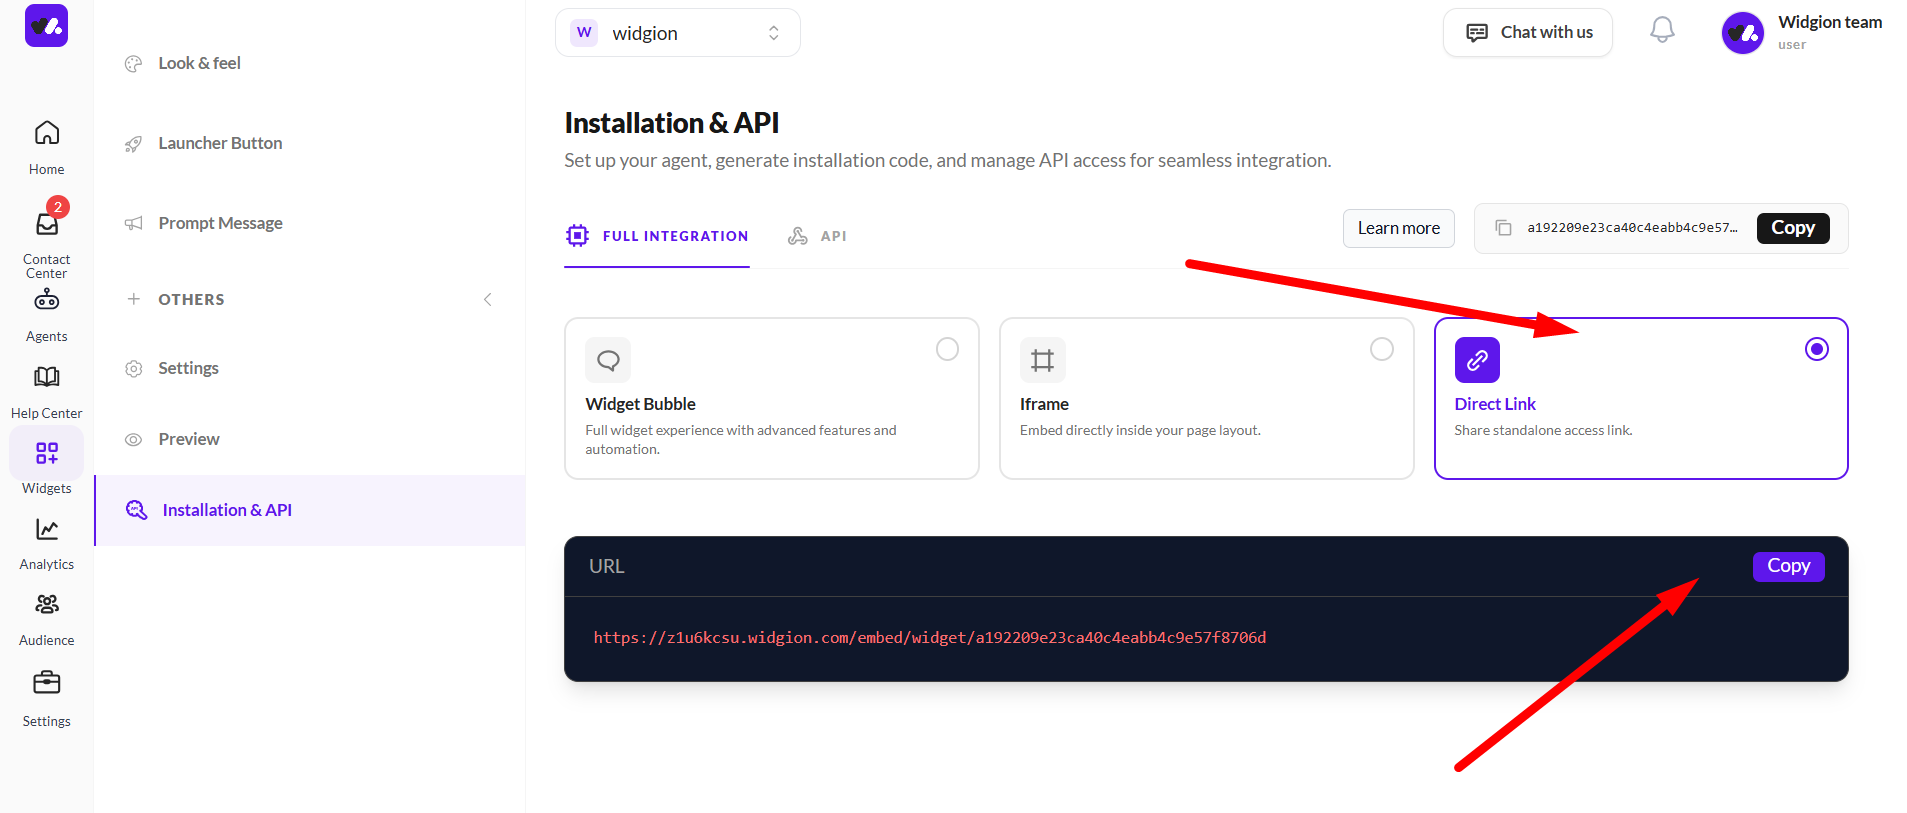
The Direct Link method provides a standalone URL to your widget, allowing you to share access without embedding it into your website. This is useful for sharing content through menus, buttons, emails, or support messages.
To use it, select the Direct Link option and copy the generated URL. You can place this link anywhere users need access. When opened, it directs users to your widget in a dedicated view.
 Installing Using API (Default Launch)
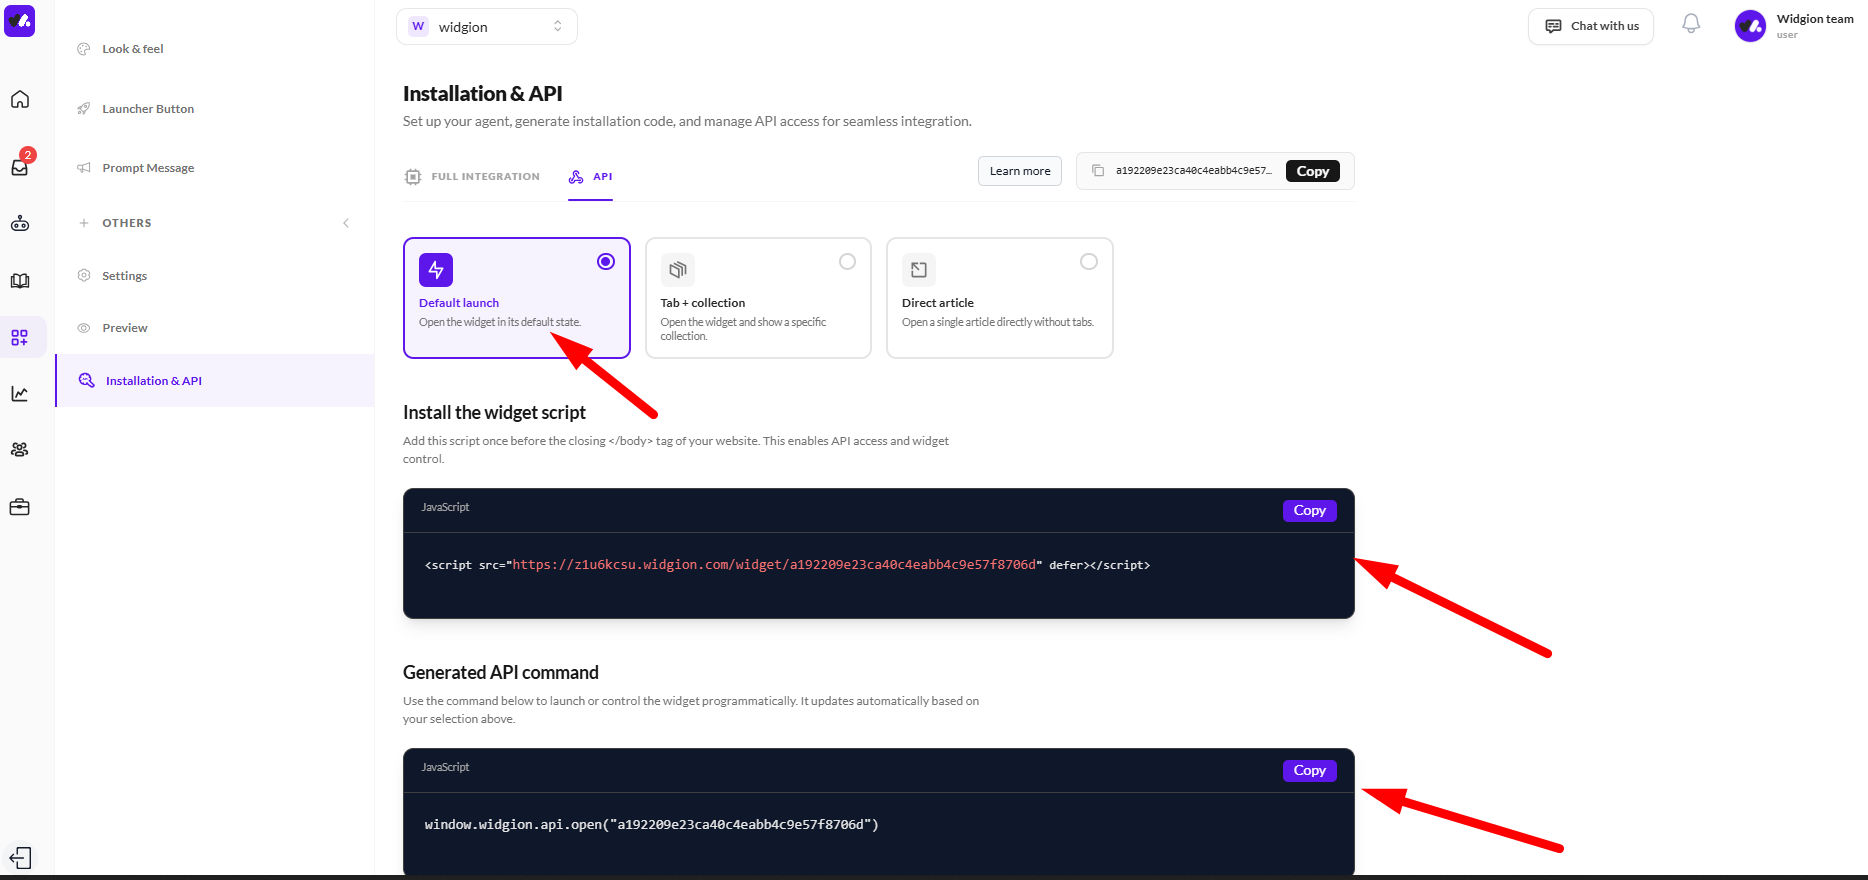
The Default Launch option under the API tab allows you to control how the widget opens programmatically. This is useful when you want the widget to appear based on user actions, such as clicking a button.
Start by installing the base widget script on your website before the closing </body> tag. Then, copy the generated API command and add it to your site’s code where you want the trigger to occur. This gives you flexibility to control when and how the widget opens.
Installing Using API (Tab + Collection)
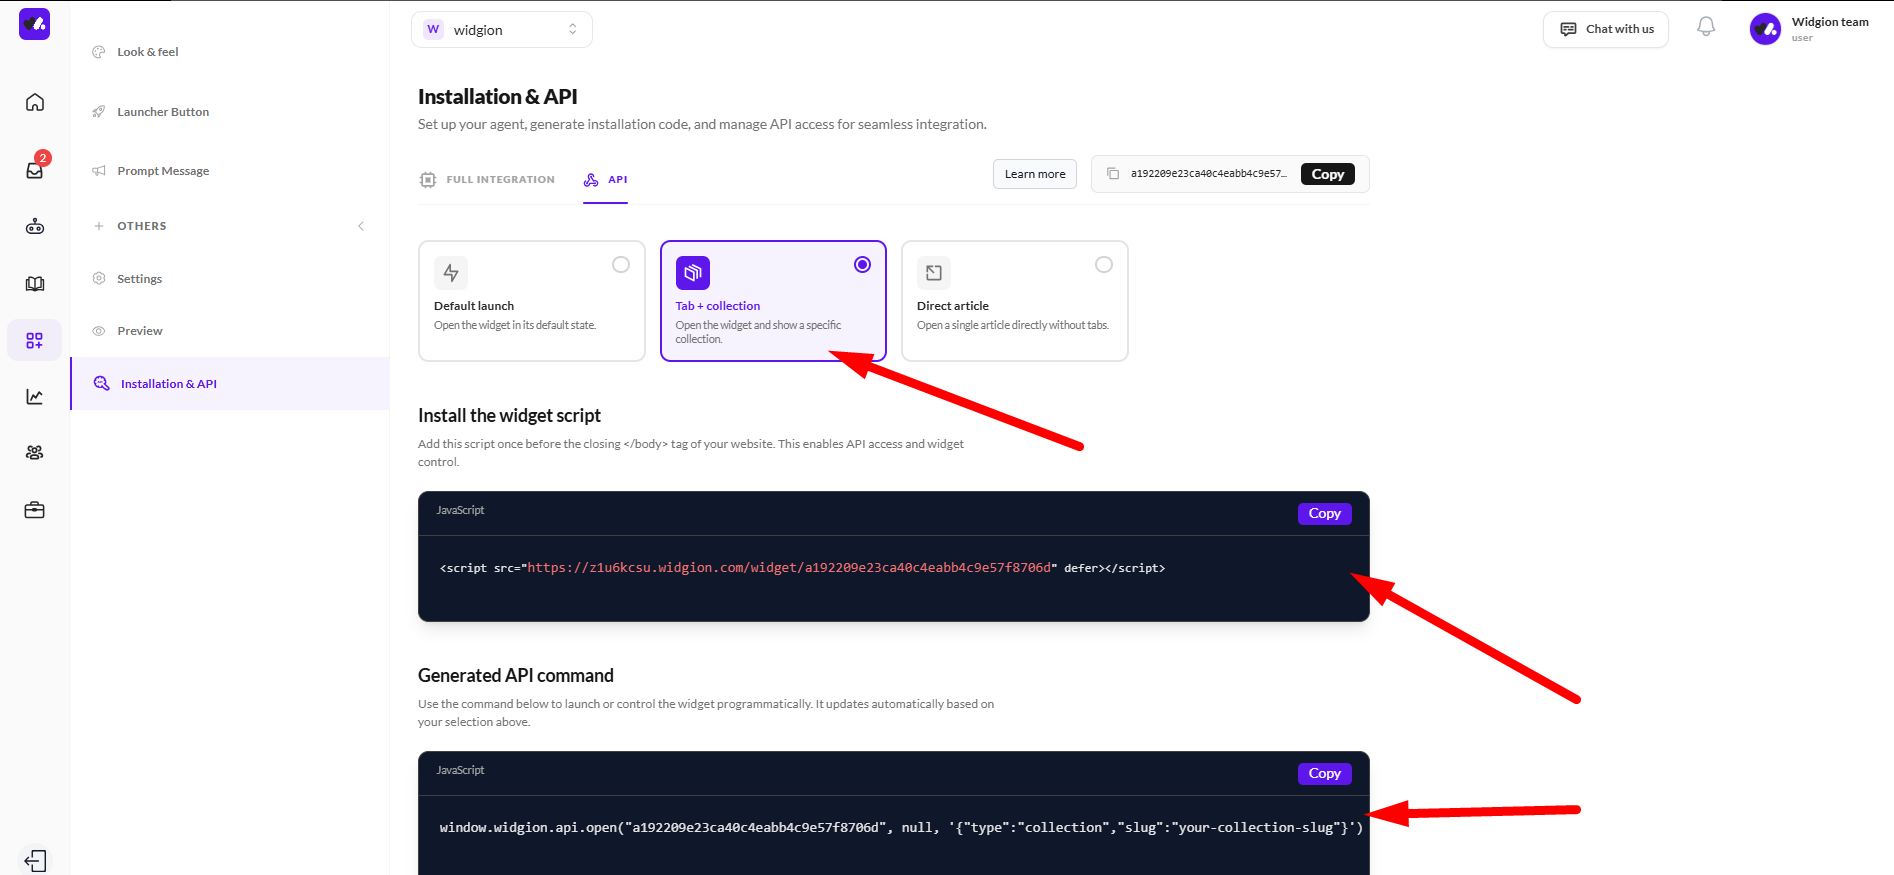
The Tab + Collection option allows you to open the widget programmatically while directing users to a specific collection or category. This is useful for guiding users to a focused set of content.
After installing the base script, copy the generated API command and place it where the interaction should occur. When triggered, the widget opens and displays the selected collection, improving navigation and reducing time to find relevant information.
Installing Using API (Direct Article)
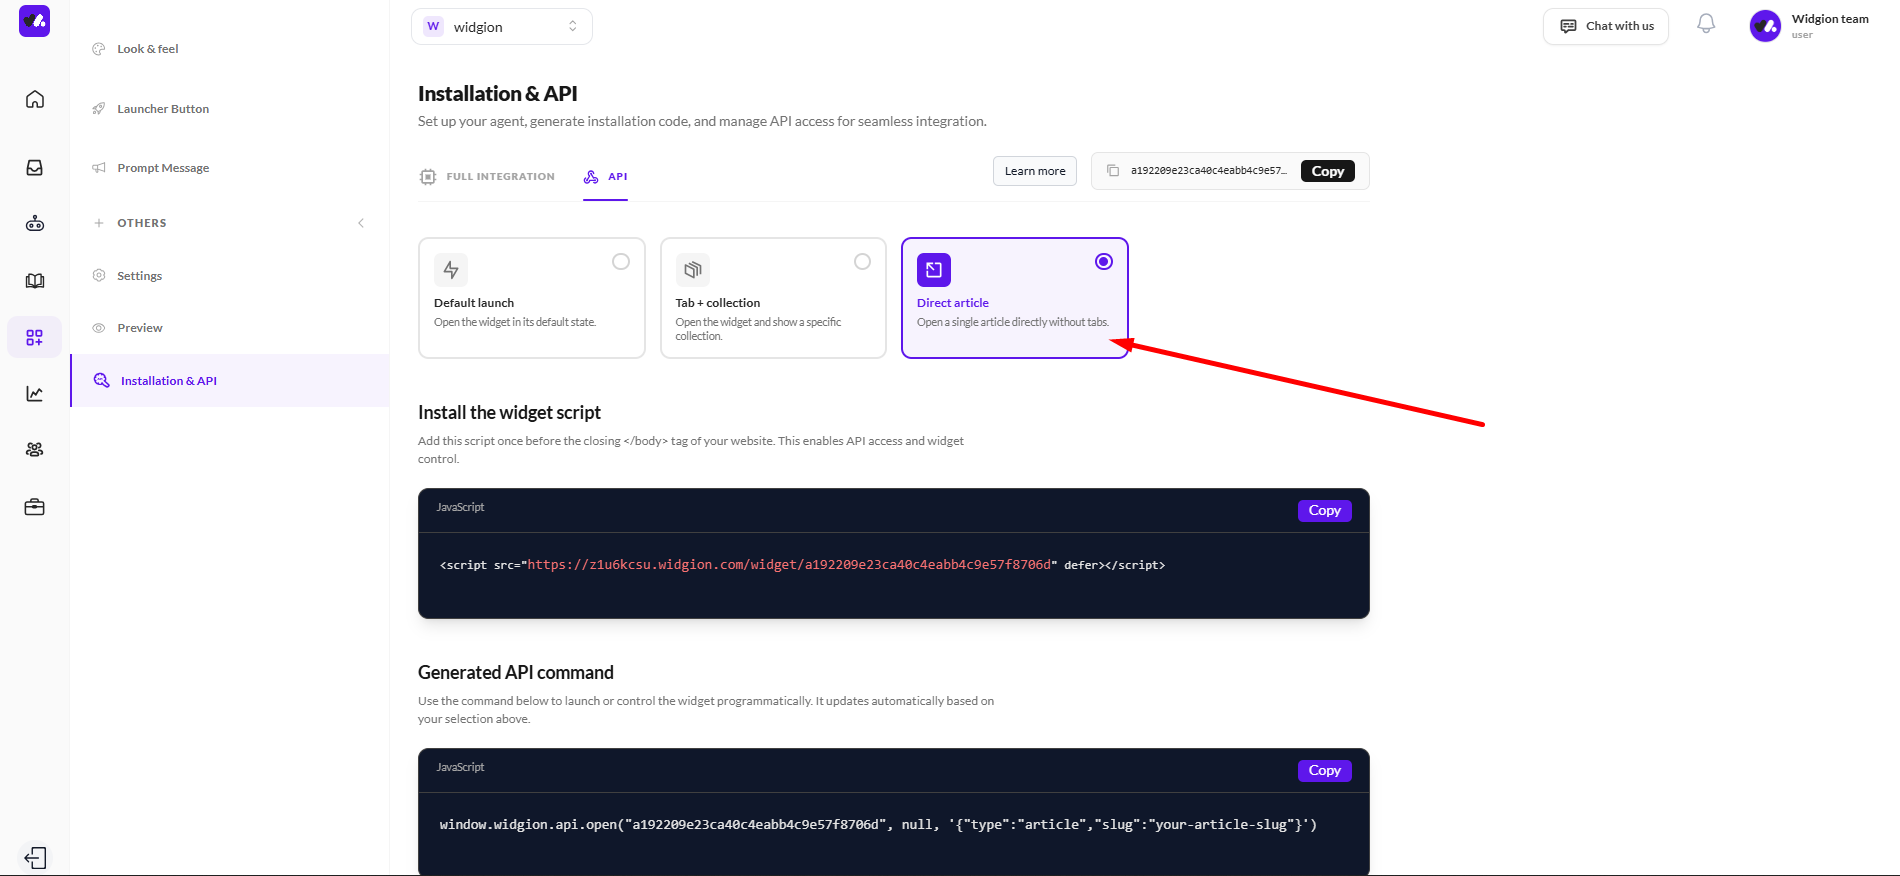
The Direct Article option allows you to open the widget and take users directly to a specific piece of content. This is ideal for linking users to precise answers or announcements.
To set this up, install the base widget script and then add the generated API command to your code. When triggered, the widget opens directly to the selected content, creating a fast and targeted user experience.
Choosing the Right Installation Method
Each installation method serves a different purpose depending on how you want users to interact with your widget. The Widget Bubble is ideal for always-accessible support, the Iframe works well for embedded layouts, and the Direct Link is best for quick sharing.
The API options provide advanced control, allowing you to trigger the widget based on user behavior or context. Choosing the right method helps align your widget with your website structure and user journey.
Final Checks Before Going Live
Before publishing, ensure your installation code is correctly added and that the widget loads properly across your website. Test all interactions, especially if you are using API triggers, to confirm everything behaves as expected.
Once verified, your widget is ready to support users directly within your platform. A properly installed widget improves accessibility, enhances user experience, and ensures your content is always within reach.
Did this answer your question?
0 Likes
0 Unlikes